Follow these steps to add a pole top bracket to an assembly:
- Click the plus (+) symbol next to the inline assembly name. If a single cross arm is on the pole, the bracket is attached to the side of the pole opposite that cross arm.

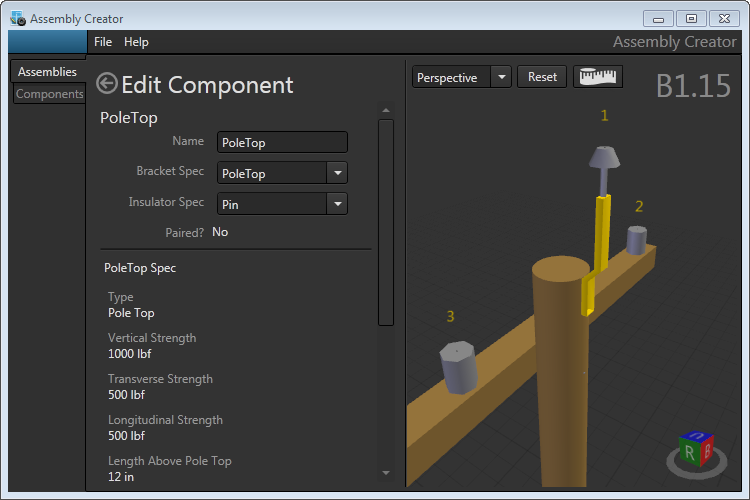
If another pole top bracket exists on the pole, the brackets are paired. With paired pole top brackets, changing the insulator on one bracket will automatically change the insulator on the other to match. - Select Pole Top Bracket from the drop-down menu. This option only appears if there are fewer than two pole top brackets on an assembly. Once selected, the image on the right is temporarily updated with the equipment highlighted in gold.
- Select the Insulator Spec from the drop-down list. The list is populated with any insulators created in Assembly Creator. Refer to the Insulator topic in this guide for information on creating this equipment.
- Click Create. Assembly Creator adds the bracket to the assembly and no longer highlights the equipment.
|
Because Assembly Creator does not model the exact physical specifications of brackets, the Overhead Design Analysis (OHDA) tool will not calculate transverse wind loads on the equipment. |
