|
Use the Profile tab in OHDA to modify the surface beneath the cables and poles by defining the terrain, adding structures, setting span length, and changing the base surface type. Profile Tab Sections |
|
Structures
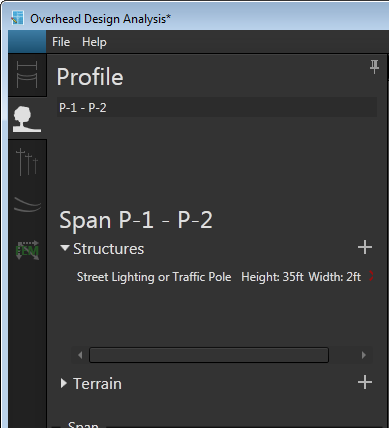
Click the triangle next to Structures to toggle expansion of the list of structures in the current span.
 |
Once a structure is placed, it cannot be edited. You must delete it and create another structure with the updated dimensions. |
Follow these steps to add structures to a scenario:
- On the Profile tab, click the plus (+) symbol next to Structures. This displays the Add Structures form.
- Select the type of structure you want to add from the drop-down menu.
- Set the height and width of the structure.
- Click the
 button next to the drop-down menu. The structure is temporarily added to the Profile view canvas at the beginning of the current span.
 - Move the mouse over the Profile view canvas to change the structure's location. Click at the spot in the span you want to place the structure.
OHDA will automatically level the terrain directly underneath a structure that is placed on uneven terrain. If you delete the structure, the terrain will return to its original topography. - Click the Calculate button to analyze the updated scenario. The Clearance line will adjust to account for the structure, if needed.
- Click the circled arrow next to Add Structures to return to the Profiles tab. Any added structures will appear in the list beneath the Structures heading on the Profile tab.
|
If you make an edit to a profile that changes the distance of a span with structures, terrain modifications, or surface types, OHDA will automatically delete that span's modifications. See the Impact of Span Length Changes topic for more information. |
Click the red X next to the structure to delete in the Structures list on the Profile tab.
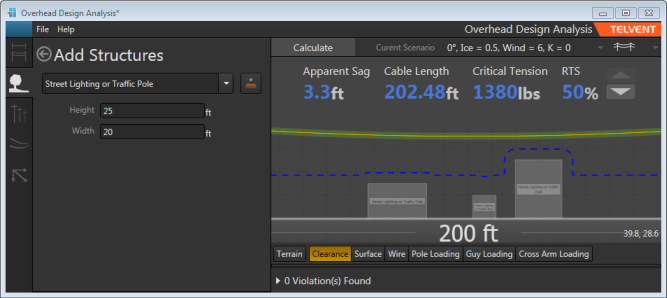
Figure 1, Structures placed in a scenario
Terrain
If the terrain feature you plan to add covers the full length of the span, you may want to set the base surface type instead (see Rules section below). You can define terrain features on top of the base surface type.
Click the triangle next to Terrain to toggle expansion of the list of terrain features in the current span.
|
Once a terrain feature is placed, it cannot be edited. You must delete it and define a new terrain with the updated dimensions and type. |
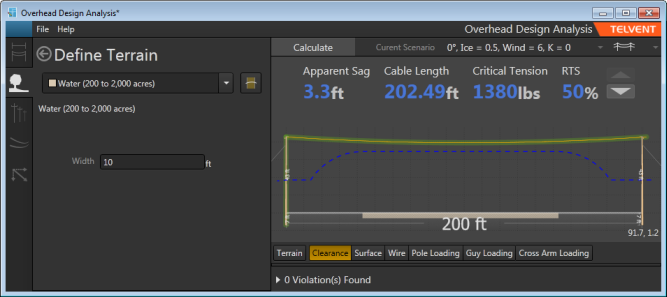
You can add terrain features such as roads, water, railroad, boat ramps, etc.
- On the Profile tab, click the plus (+) symbol next to Terrain. This displays the Define Terrain form.
- From the drop-down menu, select the type of terrain you want to add.
- Set the width of the terrain.
- Click the
 button next to the drop-down menu. The terrain is temporarily placed on the Profile view canvas.
 - Move the mouse over the Profile view canvas to change location of the new terrain. Click at the spot in the span you want to place the terrain feature.
- Click the Calculate button to analyze the updated scenario. The Clearance line will adjust to account for the terrain, if needed.
- Click the circled arrow next to Define Terrain to return to the Profiles tab. Any added terrain will appear in the list beneath the Terrain heading.
Click the red X next to the terrain you want to delete in the Terrain list on the Profile tab.
Span
Use the Span field to set the length of the current span. Click Calculate to adjust the canvas display and analyze the updated scenario.
Design Rules
The Design Rules section allows you to determine the base surface type for the entire profile (e.g., road, railroad, water, etc.). The Condition Description field provides a description of the rule you have currently selected. Click Calculate to adjust the canvas display and analyze the updated scenario.
