Available in Responder Web Browser.
The Switch Order Requests window displays all current switch order requests and allows you to create new ones. This section requires that you have the Switch Order Requests configured properly (see Configuration Guide).
To create a new request, follow the steps outlined below:
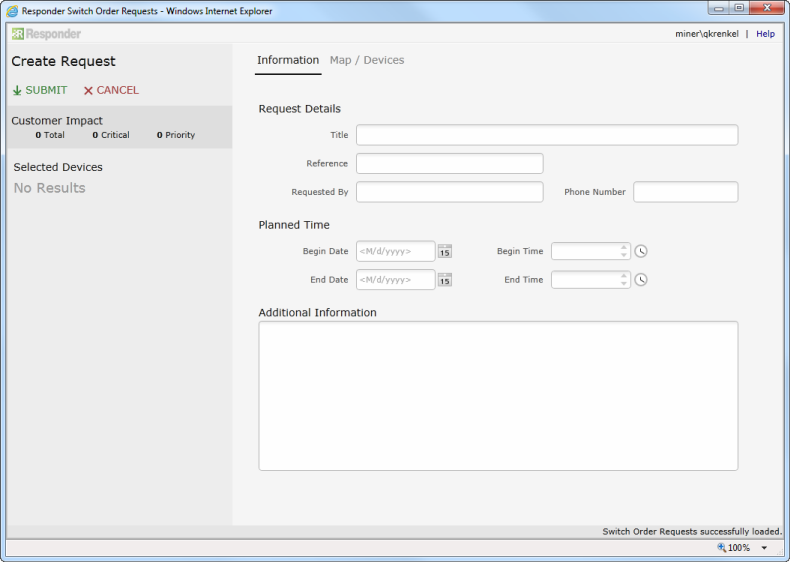
- Click Create Request in the Switch Order window. The Create Request form opens.

- Enter a Title for the request.
- Enter a Reference to an existing switching order if one exists for this request. This value is optional.
- Enter who requested the SOR in the Requested By field.
- Enter the requester's Phone Number.
- Enter the Begin and End Dates and Times for the switch order.
- Enter any Additional Information for the requested switch order. This value is optional.
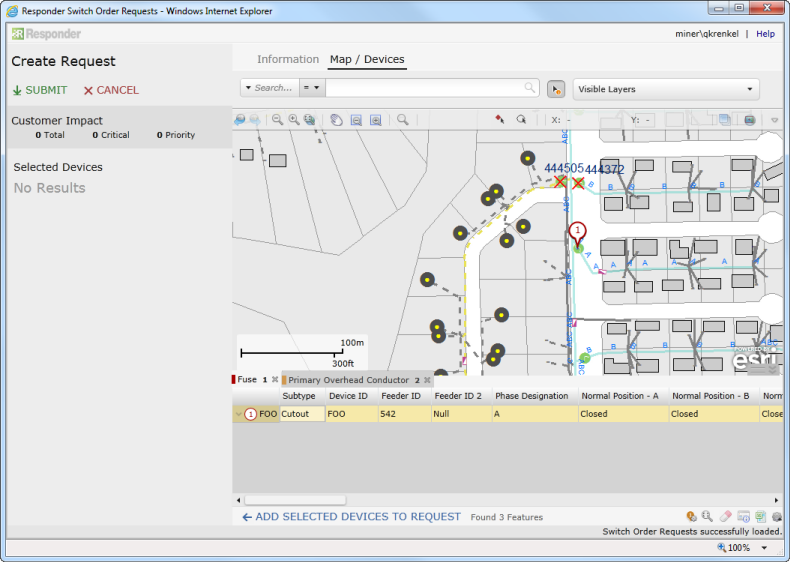
- Click Map/Devices at the top of the form to add devices to the switch order. The Map page opens.

- Navigate the map to find the features to include in the switch order by using the same set of tools available on the Map Viewer.
 |
In addition to the toolbar tools of the Map Viewer, the Create Request map tab also includes the Add Electric Feature to Request  and Add Non-Electric Feature to Request and Add Non-Electric Feature to Request  tools. You can use these tools to select devices directly from the map without needing to first add them to the Attribute Viewer. Note that the snapping for these tools is based on proper model name configuration, the same as the ArcMap tools for Creating Faults and Non-Electric Incidents respectively. tools. You can use these tools to select devices directly from the map without needing to first add them to the Attribute Viewer. Note that the snapping for these tools is based on proper model name configuration, the same as the ArcMap tools for Creating Faults and Non-Electric Incidents respectively.
Also, there are no locking tools on the Create Request map tab. Devices are automatically locked if they are added to the Selected Devices section in the next step.
|
- After finding/highlighting the devices in the Attribute Viewer to add to the SOR, click the Add Selected Devices to Request button at the bottom of the page. The Customer Impact displays the number of customers affected by this SOR.
- Add additional devices as needed.
- Click Submit. The new switch order request is now visible on the Switch Order Requests page.


