
| Responder Overview > Responder Toolbar in ArcMap > Build TroubleMaker Database |
Version: 10.1 |
Available in ArcMap.
|
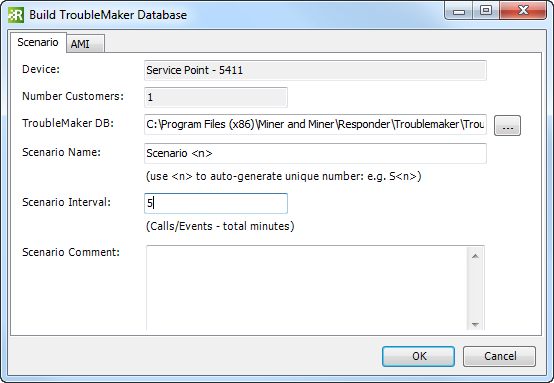
The Build TroubleMaker Database TroubleMaker uses historical customer information for dispatcher training or performance testing. TroubleMaker uses the information in your historical database to submit calls to Responder. TroubleMaker should always be used on a non-production database. The Build TroubleMaker Database tool makes it easy to populate your TroubleMaker database. When you select a device, the Build TroubleMaker Database tool compiles a list of all customers downstream of the device and adds them to a user-defined TroubleMaker database. This requires the presence of a TroubleMaker database. A sample is included with the TroubleMaker installation: Miner and Miner\Responder\Troublemaker\TroubleMakerData.mdb. |

 |
The sample database (TroubleMaker Scenarios.mdb) is installed in the TroubleMaker application directory. In Windows 7 and Windows Server (2003 and 2008) operating systems, users do not have write permissions to files in this location. If you choose to use the sample TroubleMaker database, you must copy it to a location where the user has write permissions (e.g., the desktop). |
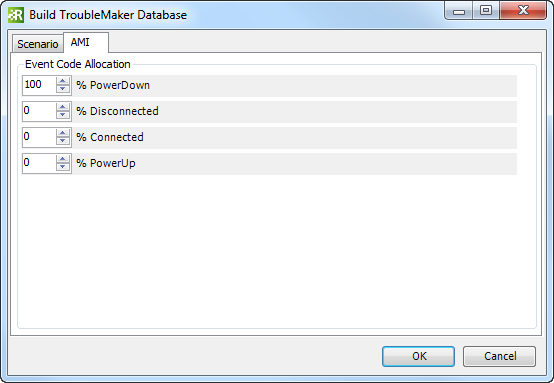
The TroubleMaker database can be used to submit calls or AMI events. When loading data into the database, you can use the AMI tab to determine the percentages for various types of events. These settings are optional.

Click OK to add the customers to the TroubleMaker database. A message appears when the customers have been added to the database.