ArcFM Engine Configuration Guide
Add Staker Tables to Enterprise Geodatabase
| ArcFM Engine > Configure Mobile - Engine > Designer Staker > STEP 2: Add Staker Tables and Assemblies > Add Staker Tables to Enterprise Geodatabase |
Version: 10.1 |
Designer Staker uses the following tables. These tables can be added through ArcCatalog's copying tool or through the Configure Designer Staker wizard. Use the Copy method to add tables that already include sample data based on RUS standards. Use the Designer Staker Wizard to add empty tables and then populate them with your own data.
Permissions: Once the tables have been added to your geodatabase,they must be assigned appropriate permissions that allow users to read and write.
The sample geodatabase, Minerville.mdb, includes the Staker tables. They contain data based on Rural Utility Standards (RUS). If your data complies with RUS, you can use ArcCatalog to copy these tables from the sample geodatabase into your geodatabase. DO NOT use Esri's Load or Load Data tools, to copy the Staker tables.
 |
You may need to restart ArcCatalog in order to see these tables once they've been created. |
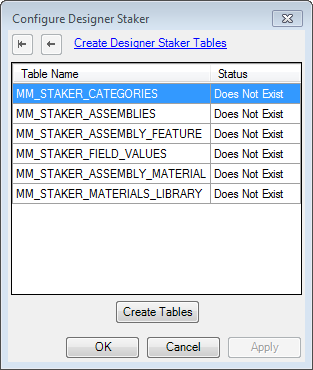
Once the tables have been copied into your geodatabase, you can use the Configure Designer Staker tool to create and edit assemblies.
The Configure Designer Staker tool adds empty tables to the geodatabase. You will need to populate the MM_STAKER_MATERIALS_LIBRARY table with your materials and then create assemblies.
 button. This button is not displayed by default. You'll need to add it using the Customize menu.