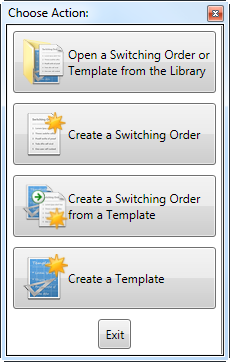
Switching orders are generally created for planned outages. There are several different methods for creating a switching order or template:
Create a Switching Order
Available in Responder Explorer.
Follow these steps to create a switching order.
- In Responder Explorer, select File > Switching Orders.

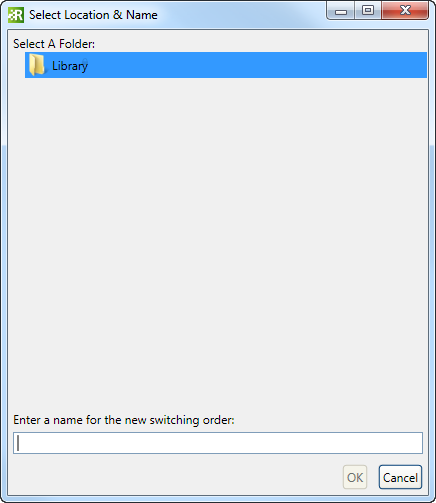
- Click Create a Switching Order. This displays the Select Location & Name screen.
- In the Select Location & Name window, browse to the location where your switching order will be stored in the Switching Order Library.
- In the field at the bottom of the screen, enter a name for your switching order. Click OK.

- Use the Switching Order Editor to edit the new switching order.
- When you've finished editing the operations, Save from the Order menu then Close.
Create a Switching Order or Template in Switching Order Library
Available in Responder Explorer.
If you have the Switching Order Library open and wish to create a new switching order or template, you can without needing to close the library. Simply right-click a directory and select New > Switching Order or New > Template. The new switching order or template will be created in the directory you right-clicked. It will also be opened for editing.
Create a Switching Order in Switching Order Editor
Available in Responder Explorer.
If you have the Switching Order Editor open and wish to create a new switching order, you can without needing to close the Switching Order Editor.
- In the Switching Order Editor, select Order > New.
- In the Select Location & Name dialog, choose a folder in which the switching order will be created in the Switching Order Library and enter a name in the field at the bottom. Click OK.
- Use the Switching Order Editor to edit the new switching order. You can navigate from one switching order to another by selecting the appropriate tab at the top of the window.
- When you've finished editing the operations, Save from the Order menu then Close, or select the X on the switching order's tab.
Note: If you click the red X in the window's upper-right corner, the entire window closes, along with any other switching orders in the window. If changes have been made to any switching order, a prompt appears for you to save these changes for each order.
Create a Switching Order from a Template
Available in Responder Explorer.
Follow these steps to create a switching order based on a template.
- In Responder Explorer, select File > Switching Orders.
- Click Create a Switching Order from a Template. This displays the Switching Order Library.
- In the Switching Order Library, choose the template you wish to use to create your switching order. Right-click the template and choose Select. This displays the Select Location & Name window.
- In the Select Location & Name window, browse to the location where your switching order will be stored in the Switching Order Library.
- In the field at the bottom of the screen, enter a name for your switching order. Click OK.
- Use the Switching Order Editor to edit the new switching order.
- When you've finished editing the operations, Save from the Order menu then Close.
Create a Template
Available in Responder Explorer.
Follow these steps to create a switching order template.
- In Responder Explorer, select File > Switching Orders.
- Click Create a Template. This displays the Select Location & Name screen.
- In the Select Location & Name window, browse to the location where your template will be stored in the Switching Order Library.
- In the field at the bottom of the screen, enter a name for your template. Click OK.
- Use the Switching Order Editor to edit the new template.
- When you've finished editing the operations, Save from the Order menu then Close.
Save as Template
Available in Responder Explorer.
Alternately, you can save an open switching order as a template. Follow these steps:
- Open a switching order.
- Use the Switching Order Editor to edit as needed.
- In the Switching Order Editor, select Order > Save as Template. This displays the Select Location & Name screen.
- In the Select Location & Name window, browse to the location where your template will be stored in the Switching Order Library.
- In the field at the bottom of the screen, enter a name for your switching order. Click OK.
- When you've finished editing the operations, Save from the Order menu then Close.
Create Switching Operation
Available in ArcMap.
This tool is available in ArcMap on the Responder toolbar and allows you to create a switching operation that acts on the selected feature.
- In ArcMap, select the Create Switching Operation
 tool and click a feature on the map. The cursor will become a circle with a blue dot in the middle. The blue dot snaps to selectable features with the proper model name assigned. A layer must be set as selectable before this tool will snap to its features.
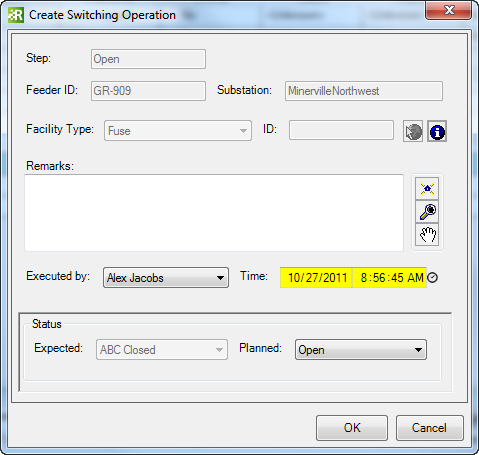
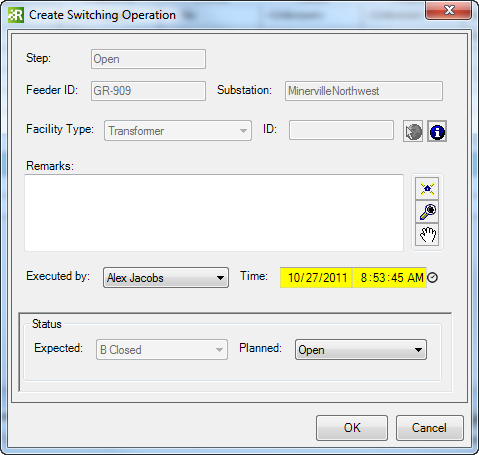
- The Create Switching Operation dialog allows the operator to enter an outage time and the name of the person who operated the device.

- You may modify the Planned Status. This field lists the phases and phase combinations that can be operated on the device. If the device's normal status is closed, the Planned field will show which phases can be opened. If the device's normal status is opened, the Planned field will show which phases can be closed.
- Click OK.
A switching operation symbol is placed on the feature in the map and a confirmed incident with restoration steps is created in Responder Explorer. Use an Edit tool to modify the restoration steps in Responder Explorer.
Add Switching Operation
Available in Responder Explorer.
This tool is available in the right-click menu on an incident in Responder Explorer.
- Right-click a confirmed incident and select Add Switching Operation.
- In ArcMap, the cursor becomes a circle with a blue dot that snaps to features. Use this to select the feature for the Switching Operations.
- The Add Switching Operation dialog allows the operator to enter an outage time and the name of the person who operated the device.

- You may modify the Planned Status. This field lists the phases and phase combinations that can be operated on the device. If the device's normal status is closed, the Planned field will show which phases can be opened. If the device's normal status is opened, the Planned field will show which phases can be closed.
- Click OK.
A switching operation symbol is placed on the feature in the map and a confirmed incident with restoration steps is created in Responder Explorer. Use an Edit tool to modify the restoration steps in Responder Explorer.


 tool and click a feature on the map. The cursor will become a circle with a blue dot in the middle. The blue dot snaps to selectable features with the proper model name assigned. A layer must be set as selectable before this tool will snap to its features.