Client machines, Responder services, and the web server must have Message Queueing enabled. If you are hosting multiple Responder components on a single machine (e.g., Responder services and web server), this step needs to be performed only once. For Responder Services, you must assign permissions to the Oracle directory.
Windows 7
Windows XP
Windows Server 2008
Windows 2000 & 2003
Windows 7
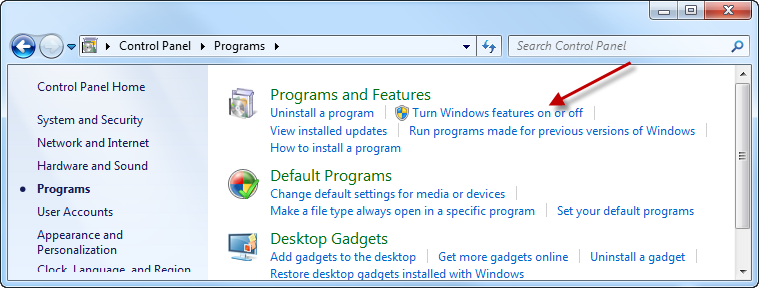
- From the Windows Control Panel, select Programs.
- Select Turn Windows features on or off.
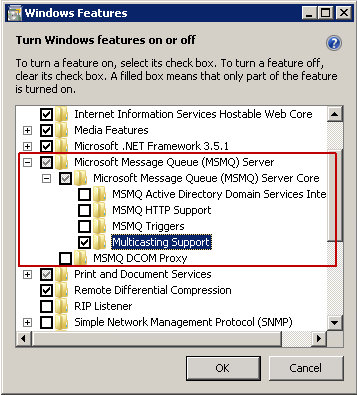
- Expand Microsoft Messaging Queue (MSMQ) Server.
- Select the Multicasting Support checkbox. This is the minimum requirement for Responder.
 |
If selected, we recommend clearing the MSMQ Active Directory Domain Services Integration option unless it is absolutely necessary for other product's functionality. |
- Click OK.
Windows XP
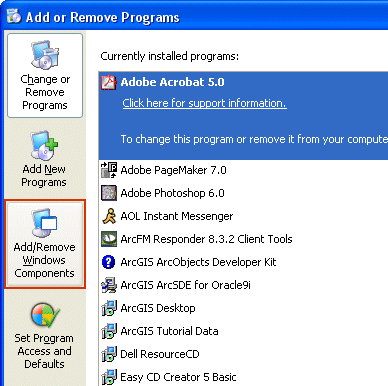
- From the Windows Control Panel, select Add/Remove Programs.
- Click the Add/Remove Windows Components button.
- In the Windows Component Wizard, select the checkbox next to Message Queueing.
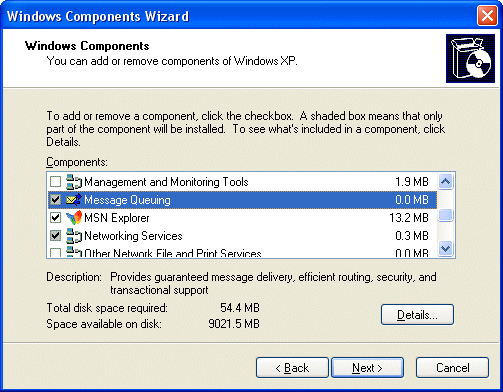
- Click the Details button.
- Select only Common. This is the only subcomponent required by Responder. However, you may elect to use additional subcomponents. If this is the case, the selections MUST match between the server and client machines. Clients may experience difficulties connecting to the server if these settings do not match.

- Click OK.
- Click Next to install the component.
- Click Finish when installation is complete.
Windows Server 2008
- From the Windows Control Panel, select Programs and Features.
- Click Turn Windows features on or off.
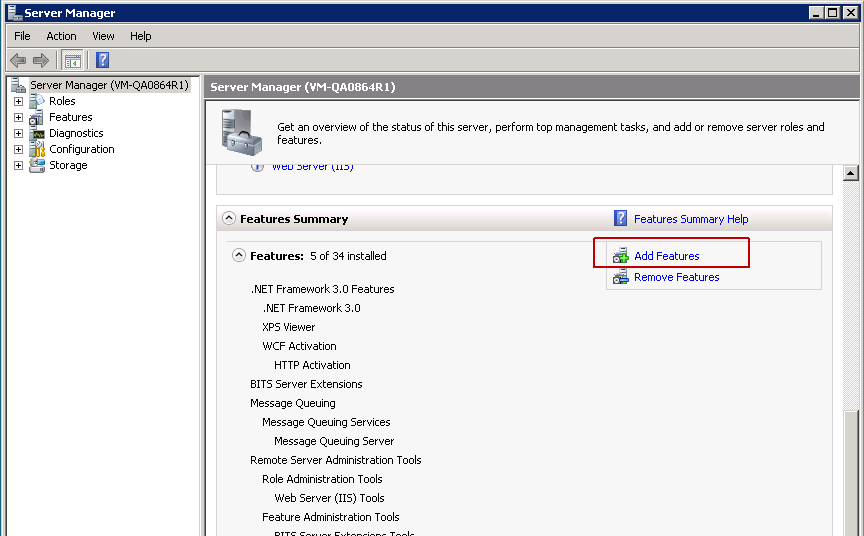
- Scroll down to the Features Summary section and click Add Features.
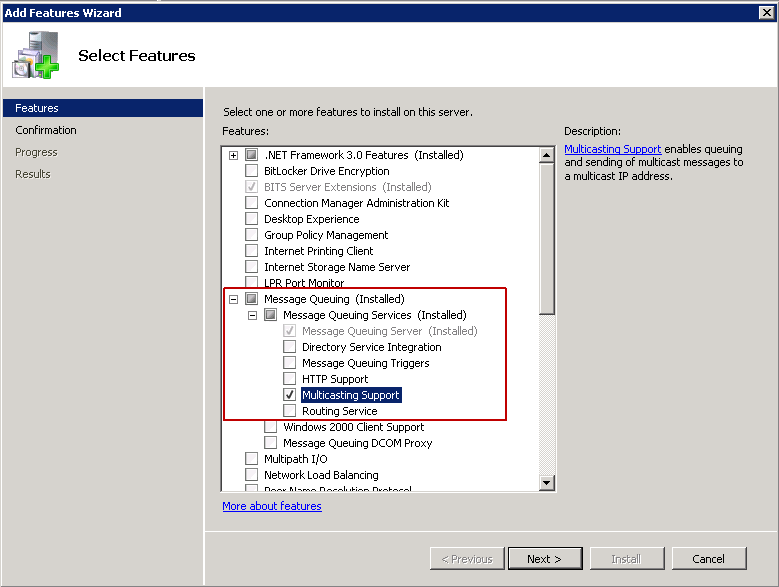
- Expand Messaging Queuing.
- Expand Message Queuing Services.
- Select the checkbox for Multicasting Support. This is the minimum requirement for Responder.
- Click Next.
- Click Install.
Windows 2000 & 2003
- From the Windows Control Panel, select Add/Remove Programs.
- Click the Add/Remove Windows Components button.
- In the Windows Component Wizard, select the checkbox next to Message Queuing.
- Click Next to install the component.
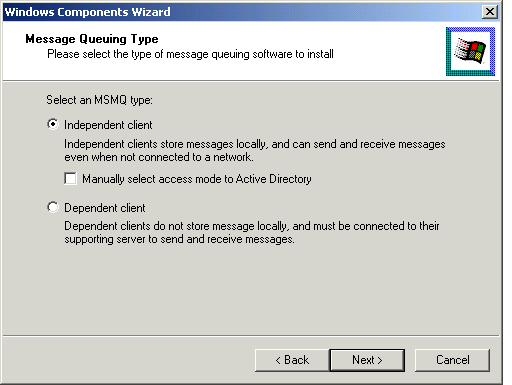
- On the Message Queuing Type screen, choose Independent client.
- Click Next.
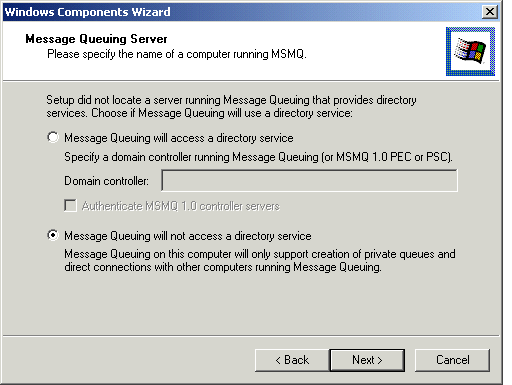
- On the Message Queuing Server screen, choose "Message Queuing will not access a directory service."
- Click Next.
- Click Finish when installation is complete.

