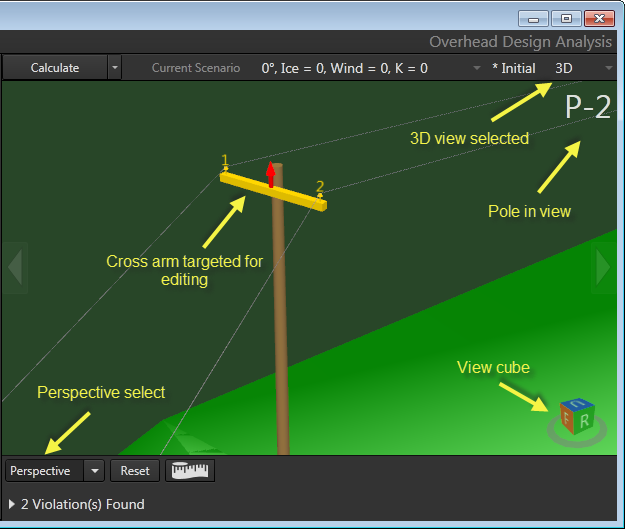
The 3D view displays the currently selected pole in three dimensions.
You can double-click any component of the scenario in 3D view to open an edit form for that feature. Once in edit mode, OHDA will highlight the targeted feature in yellow. For example, the cross arm in the following image is currently targeted for editing.
Cross arms are unique in that their height can be adjusted directly on the 3D canvas by clicking and holding the red arrow and moving the mouse up and down.
Navigating the canvas in 3D view:
| Pan: | While holding the Shift key, click and drag with the right mouse button to pan. |
| Rotate: | Click and drag with the right mouse button to rotate the view on the canvas. |
| Zoom: | Scroll the mouse wheel to zoom in and out on the canvas. |
| Jump to view: | Click on a visible side of the view cube to jump to that perspective. Alternatively, select a perspective from the drop-down in the upper-left portion of the canvas. |

Use the Tape Measure tool to measure the distance between two objects in 3D view. To use, click the icon. The icon's background turns yellow. Click once on the 3D canvas to anchor the beginning point of your measurement. Click again to set the endpoint for your measurement. The total distance will pop up on the canvas. When finished, click the Tape Measure tool icon again to disable.
 |
The tool will snap to the closest feature when setting both the beginning point and endpoint. |
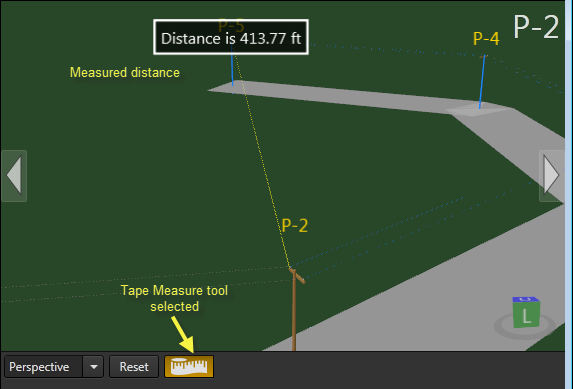
Measuring the distance between two poles in a scenario
Snapshot Tool

Use the Snapshot tool to capture the current 3D view of scenario poles. Once captured, OHDA automatically attaches the images to the Notes section of the relative pole:
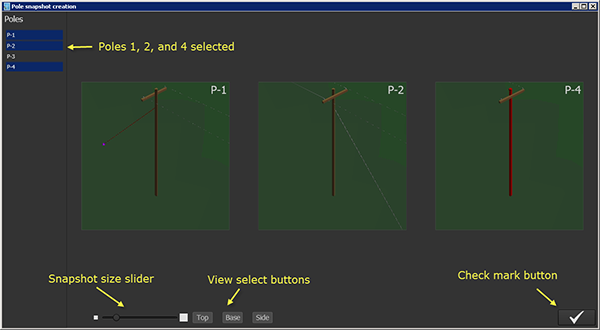
- Click the Snapshot tool. The Pole snapshot creation window opens with a snapshot view of each pole.
- You can navigate each pole's view independent of the others, or use the Top, Base, or Side buttons to jump each snapshot to the relevant view.
- Use the snapshot size slider to control the size of each snapshot.
- By default, OHDA creates snapshots for all poles in the scenario and lists those poles in in the upper-left corner of the window. Use standard Windows multiselect controls to tell OHDA which snapshots to create.
- Click the check mark button to save the selected snapshots to the relevant pole's notes.