
| Smart Grid Applications Overview > Responder Overview > Optional Configurations > Regions > Set Up Regions in ArcMap |
Version: 10.1 |
This section describes how to prepare your map to use the Region polygon feature class created during configuration. The Regions functionality allows you to place regions on the map, then group them into one or two groups (parent regions).
In ArcMap, draw the regions editing the geodatabase and placing polygons that represent the smallest regions. If regions overlap, customers are assigned to the first region found (a customer may be assigned to only one region). If a region does not cover an area in the service territory, that area is considered an "unknown" region.
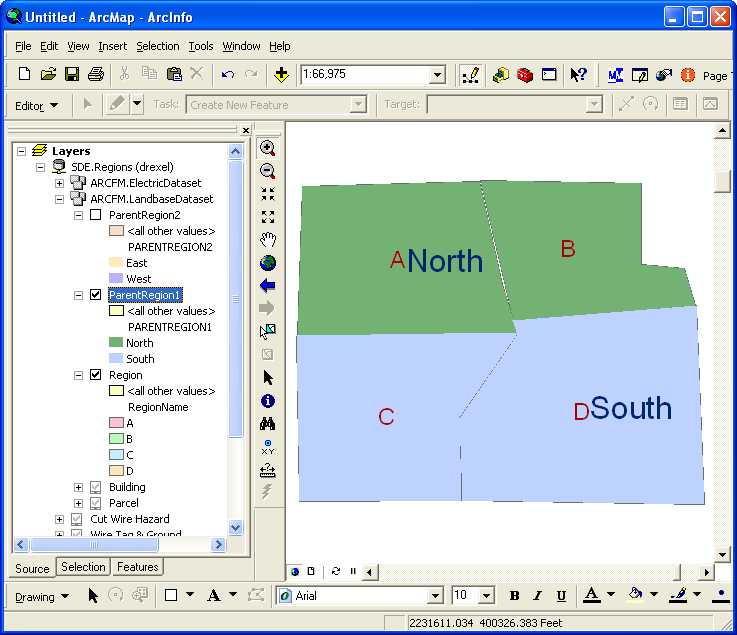
Once you have placed a region, select it and edit its RegionName field to be a unique name (e.g., A, B, C, D).
If you wish to create parent regions, simply enter the name of the parent region in one of the ParentRegion fields. These values are case-sensitive. If you enter North on one region polygon and north in a second region polygon, you will see two regions: North and north. Parent regions are grouped first by model name (RXREGIONPARENT1, RXREGIONPARENT2), then by the value entered in the field. So, a value of North entered in the ParentRegion1 field for one feature and in the ParentRegion2 field for another feature will not be grouped together.
 |
RegionName and ParentRegion fields are case-sensitive. |
Once you have your regions placed on the map, you may want to format their symbology in order to view the various regions and region groups you've created.
 button to add another Region layer for each parent region you've created.
You will modify the symbology for each layer to show either the individual regions or the parent region groups. This way the user can turn layers on/off in the Source tab to view separate regions or parent region groups.

The Region layer is displayed.

The Region and ParentRegion1 layers are displayed.
Once you've finished setting up regions in ArcMap, perform the following two steps: