Creating Query Layers is an alternative to creating XY Event Layers and may provide better performance.
- From the main menu, select File | Add Data | Add Query Layer. Or, right-click Layers and select Add Data.
- Browse to the table in the database. Below are the tables used by the Responder layers in the sample data.
- Hazards: RX_HAZARDS
- Tags and Grounds: RX_TAGS_AND_GROUNDS
- Non-electric Features: RX_INCIDENT_FEATURES
- Incidents:
- Incident Devices: RX_INCIDENT_DEVICES_VIEW
- Cut Wire Incident: RX_INCIDENT_DEVICES_CUTS_VIEW
- Single Premise Incident: RX_INCIDENT_DEVICES_SVC_VIEW
- Crews:
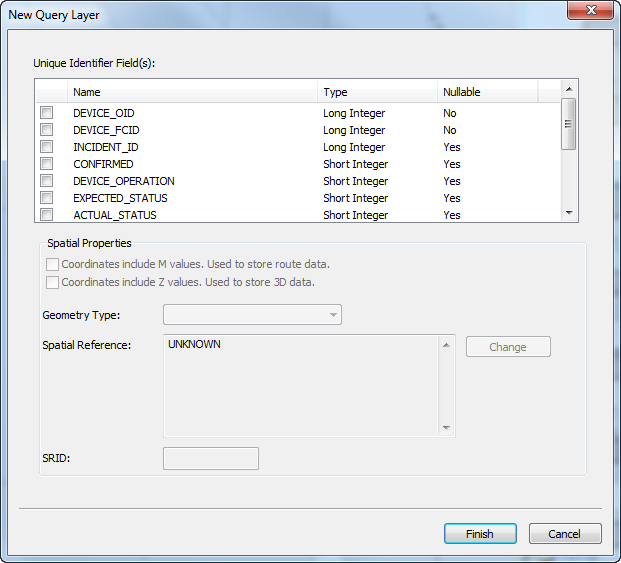
- Click Add. The New Query Layer window opens.

- Select unique identifiers for the view. For Responder views, the unique identifier is a combination of Device_FCID and Device_OID. For tables such as RX_Hazards, that already have a unique identifier, select ID.
- Click Finish.
- Right-click the Query Layer created in the List by Source view of the Table of Contents. Select Display XY Data.
- Verify the XY data is correct on the Display XY Data window. Click OK.
- Once you've added the Query layer, right-click it and select Properties. Select the General tab and modify the Layer Name as appropriate.
- By default, the Query layers are added under the Layers node on the Display tab. Click the Query layers and drag them into the Responder_cached group. Some of the layers in the sample data are organized into group layers (e.g., Hazards, Incidents, Crews) within the Responder_cached group.
Once you've finished adding Query layers, you can create symbology for them.


