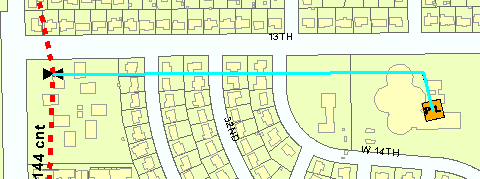
The OTDR Trace tool traces all fibers and connections within a user-defined distance along an end-to-end path. The following section describes how to perform an OTDR Trace.
- Click the OTDR Trace button
 on the Fiber Manager Toolbar.
 - Use the flag cursor to select the feature (e.g., patch panel) you wish to define as the trace origin. If you are unable to select a feature with the flag cursor, zoom into the area first.
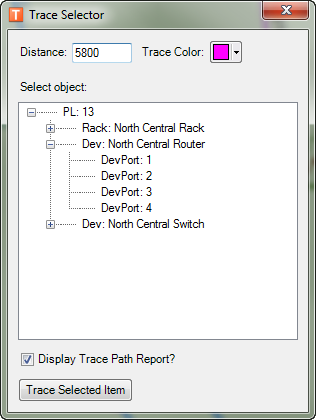
- The Trace Selector window opens. Enter the trace distance by typing the number into the form's field.

- If you would like to change the color of the highlighted results, click the Trace Color button to bring up a color palette and select the color of your choice.
- Check the Display Trace Path Report checkbox to create a report of the trace results.
- Choose a port from the selection tree that represents the origin of the OTDR trace.

The OTDR trace behaves like a directional trace when performed on objects containing implied connections, such as front and back ports. This tool traces in the direction of the implied connection. That means that if you start the trace on the front port it traces in the direction of the back port. Likewise, if you start the trace on the back port it traces in the direction of the front port. - Click the Trace Selected Item button to execute the trace.

- If you checked the Display Trace Path Report, a trace report is displayed in your web browser upon trace completion.
- Click the Clear Graphics
 button on the Fiber Manager toolbar to clear the OTDR trace results from the map.
