ArcFM Engine applications (e.g., Designer Staker, ArcFM Viewer for ArcGIS Engine) provide a way to add toolbars to the user interface as well as tools to toolbars. This page discusses how to add a toolbar to the user interface, how to add tools to a toolbar already in the user interface, and how to lock a toolbar.
Add Toolbar to User Interface
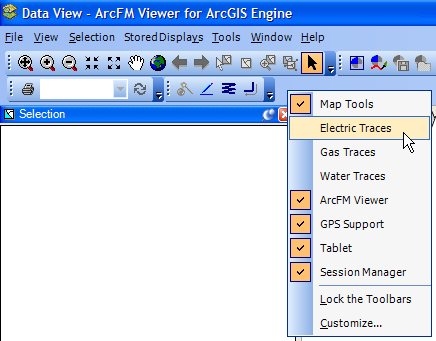
If a toolbar is missing from your ArcFM Engine application (e.g., ArcFM Viewer, Designer Staker), you may restore it to the user interface using a couple different methods.
- Right-click the area around the toolbars.
- Select the toolbar from the list. If a checkmark appears next to the toolbar, it is already in the display.

Figure 1, Toolbar menu in ArcFM Viewer for ArcGIS Engine
Add Tools to Toolbar
The Customize menu allows you to add tools (or commands) to a toolbar that is already displayed in the user interface. To access the Customize menu, right-click the area around the toolbars and select Customize.
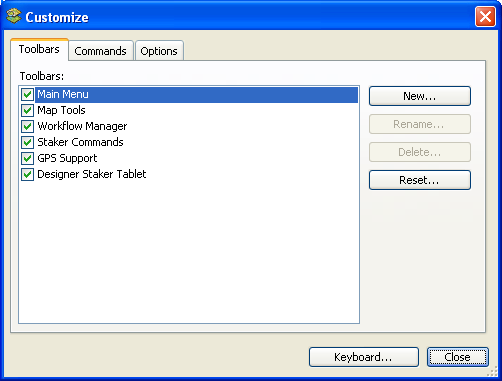
The Toolbars menu allows you to display toolbars in the user interface. Select the checkbox to display a toolbar or unselect it to remove that toolbar from the user interface. You can also select a toolbar and click the Reset button to put the toolbar back in its default state. The Reset button will remove any tools that are not displayed by default on the selected toolbar or restore any tools that have been removed.

Figure 2, Customize Menu in Designer Staker (Toolbars tab)
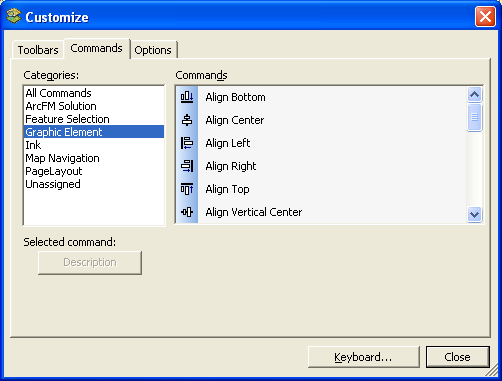
To add a tool to an existing toolbar, select the Commands tab. Select the category that contains the tool you want to add. All ArcFM Solution commands are stored in the ArcFM Solution category. Select the command in the Commands list and drag/drop it onto a toolbar. To remove a tool from a toolbar, open the Customize menu, then drag the tool off of the toolbar.

Figure 3, Customize menu in ArcFM Viewer for ArcGIS Engine (Commands tab)
Lock Toolbars
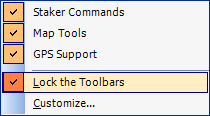
You can keep the toolbars in place by locking them. Right-click any toolbar and choose Lock the Toolbars.

Figure 4, Lock the Toolbars command
