If you do not already have Fiber features in your geodatabase, you may import them from the Minerville.mdb sample geodatabase. This step allows you to import the schema as well as the model name and autoupdater assignments. If you use this process the default values and aliases will also be set up automatically.
Import Schema
Use the ArcGIS Import/Export tools to export the schema from the sample geodatabase (Minerville.mdb) and import it into your geodatabase. Follow the steps outlined below.
- Download the Minerville.mdb geodatabase. This is available in a zip file in the same location as the latest installers. Be sure to use the Minerville.mdb geodatabase that comes with your most recent installed version of ArcFM. This ensures you get the most recent data.
- Browse to the sample geodatabase (Minerville.mdb) in ArcCatalog.
- Right-click FiberDataset and select Export > XML Workspace Document.
- Select the radio button next to Schema Only.
- Select a path and an XML file name. Click Next.
- The Export XML Workspace Document window will prompt you to select the items to be exported. Once you've finished making selections, click Finish.
- After the export has completed, right-click the new geodatabase and select Import > XML Workspace Document.
- Select the radio button next to Schema Only.
- Browse to the XML document created in step 6 and click Open.
- Click Next.
- The next screen displays the schema to be imported. Any layers in red text will not be imported because it already exists in the geodatabase. The datasets that contain these red features may be created, but empty. These can be deleted. Click Finish.
ArcFM XML Import
Next, you'll need to use the ArcFM Import/Export tools to export ArcFM Properties such as domains and model name assignments from the sample data (Minerville.mdb) and into your geodatabase. Follow the steps outlined below.
- Right-click the Minerville.mdb geodatabase and select ArcFM XML Export.
- Select the following checkboxes:
- ArcFM Model Name Information
- ArcFM Properties
- ArcFM Relationship Class Info
- ArcFM Snapping Information
- Domains: Most domains are included in the Import Schema steps. However, that import does not include the Fiber model name domains which are necessary for the ArcFM Model Name Information option to successfully provide model name assignments.
- Browse to the location you want to save the file and give it a name.
- Click Export.
- Next, right-click your geodatabase and select ArcFM XML Import.
- Select an Option (Keep Existing is recommended to be sure nothing is overwritten).
- Browse to the file you just exported.
- Click Import.
Reports
The sample data includes configuration for the Flexible Patch Panel Connection Report. However, this configuration also includes steps that involve editing existing features in the geodatabase. Follow the steps on the Flexible Patch Panel Connection Report page, Add Default Values to Existing Features section.
Create SpliceType Domain
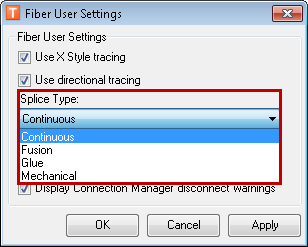
The SpliceType domain provides the values in the Splice Type field on the Fiber User Settings, Fiber System Settings and Connection Manager. Create this domain with the exact name shown below (case-sensitive). Add the coded values that make sense for your business.
- Domain Name: SpliceType
- Field Type: Text
- Domain Type: Coded Values
- Split Policy: Default Value
- Merge Policy: Default Value
If the SpliceType domain already exists in the geodatabase, it must NOT be renamed in any way. It must always be named: SpliceType. It must be spelled and capitalized exactly as shown.

Figure 1, Fiber System Settings

Figure 2, Connection Manager

