The Workflow Manager Data Source Wizard allows you to change the data sources for design workspaces (Designer only). You may wish to first use the ArcFM Data Source Wizard to convert the data sources for design stored displays first.
 |
Once you have begun updating data sources, the tool may not be stopped, cancelled, or undone. Telvent strongly recommends that you back up the MM_WMS_DESIGNS table prior to using the Workflow Manager Data Source Wizard.
|
The Workflow Manager Data Source Wizard is installed in the ArcFM Solution\Bin directory. Look for: WorkflowManagerDataSourceWizard.exe. Double-click this .exe file to open.
Follow these procedures to update data sources for your design workspaces:
- Before updating data sources, back up the MM_WMS_DESIGNS table.
- Double-click WorkflowManagerDataSourceWizard.exe to open.
- On the login screen, log into your Workflow Manager database (e.g., WorkflowManager.mdb). The login user must have read/write permissions on the MM_WMS_DESIGNS table. The sample data requires that you log in as the PROCESS user.
The ArcFM Solution supports two types of login authentication: database and operating system. Database authentication requires the user to enter their user name and password when logging into an ArcFM application. Operating system authentication uses the user's Windows login name and password. If you wish to use operating system authentication, your Windows user name and password must be valid for the selected Process Framework database. Authentication does not impact Access geodatabases.
- Select the "Login using operating system authentication" checkbox if you wish to use your Windows login user name and password. If you're using the sample data, a Windows user name/password must exist for the PROCESS user to use operating system authentication. This field is disabled if you have an Access database selected.
- The initial screen in the wizard reminds users to back up the MM_WMS_DESIGNS table. This is a critical step. Once the Data Source Wizard has started, it may not be stopped or cancelled; the results may not be undone. If you have not backed up this table yet, do so now. Click Next to continue.
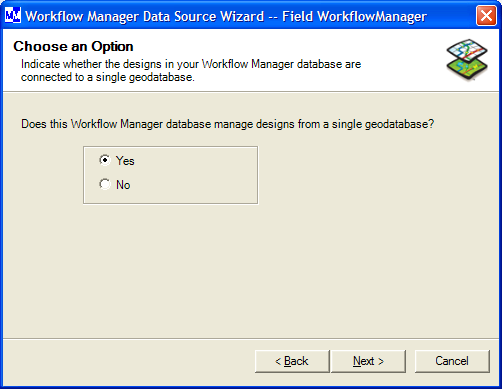
- Indicate the number of different data sources in your selected workspace.
Yes: Your database contains a connection to only one data source.
No: Your database contains connections to multiple data sources.

- If you selected Yes, skip to the next step. If you clicked No, you will need to specify an original data source. All layers connected to this data source will be updated to connect to the destination data source (specified in step 7). Click the "Choose data source" button to browse to the SDE connection. You cannot use an access database as a data source. This is the connection to the edit workspace, NOT the Process Framework database. You may be prompted to enter a user name and password. You may enter them here and won't be prompted again. If you do not enter them here, you may be prompted later. Click Next to continue.
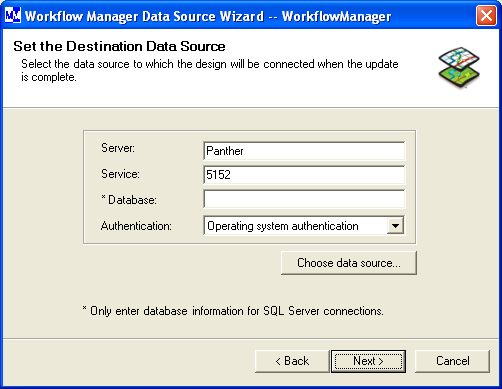
- Indicate the destination data source. This is the database to which the layers will be connected. Click the "Choose data source" button to browse to the SDE connection. You cannot use an access database as a data source. This is the connection to the edit workspace, NOT the Process Framework database. You may be prompted to enter a user name and password. You may enter them here and won't be prompted again. If you do not enter them here, you may be prompted later. Click Next to continue.
Authentication: If you're using an ArcSDE geodatabase, you may select the type of Authentication. Database authentication requires the user to enter their user name and password when logging into an ArcFM application. Operating system authentication (or single sign-on) uses the user's Windows login name and password.

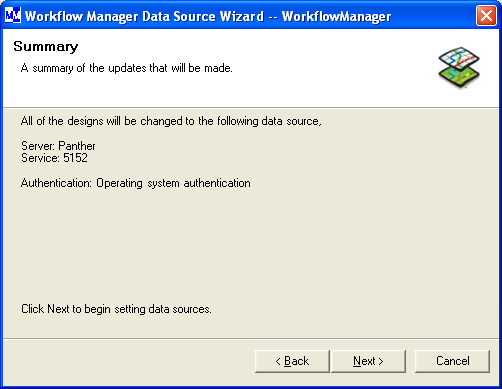
- The final screen displays a summary of what this tool will do when executed. If your workspace has multiple data sources, the original data source is displayed as well. Click Next to begin updating the data sources.
Note that this process may take an extended period of time, depending on the number of designs being connected. Once this process has started, it cannot be stopped or cancelled. If errors occur during the process, it will not be stopped. All errors are appended to the log file which may be accessed after the conversion is complete.

- When the wizard has finished setting the data sources, it writes information to a log file. This log file includes a list of designs that were converted as well as any errors that occurred. The final screen will provide a warning that failures occurred and suggest the user view the log file. To view the log file, select the checkbox. You may also save the log to a new location. Click the Browse button and browse to the location at which you wish to save the file. Then click OK.


