The feature classes discussed here do not participate in the geometric network. If you wish to create features that participate in the network, refer to Create Network Features.
- Right-click the geodatabase or dataset and select New > Feature Class.
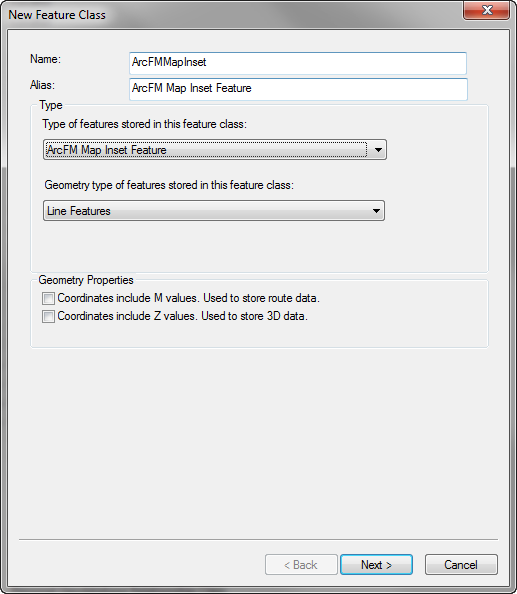
- On the first screen of the New Feature Class wizard, enter a Name and an Alias for your new feature class. The Name and Alias fields may not include any spaces or special characters.

- In the Type field choose a non-network option from the pulldown menu.
 |
The geometry types for the ArcFM and Designer feature types are listed in parentheses below. Some functionality will not work if the selected Type doesn't have the correct Geometry Type assigned (e.g., ArcFM Map Inset must have a geometry type of Line).
|
- ArcFM Annotation Feature (polygon)
- ArcFM Dimension Feature (polygon)
- ArcFM Feature (point, line or polygon)
- ArcFM Lasso Feature (line)
- ArcFM Map Inset Feature (line)
- Designer Design Feature (polygon)
- Designer Feature (point, line or polygon)
- Designer Work Location Feature (point)
- Designer Work Request Feature (polygon)
Feature-Linked Annotation: If you wish to link an ArcFM Annotation layer to an ArcFM Feature layer, select the "Link the annotation to the following feature class" checkbox and select the ArcFM Feature from the pulldown list. Note that you must create feature-linked annotation in a dataset (not at the geodatabase level).
Feature-Linked Annotation and Mobile: Feature-linked annotation may not be imported from the field to the Enterprise database.
Annotation and Geodatabase Replication: When registering an Annotation feature class (or the data set to which it belongs) as versioned, DO NOT select the checkbox labeled: "Register the selected objects with the option to move edits to base". Geodatabase Replication will not work for features with this option enabled.
- Select the geometry type from the pull-down menu (recommended geometry types are shown in parentheses in the bulleted list above). ArcFM Annotation does not display a geometry type field.
- The Geometry Properties do NOT impact ArcFM functionality. Leave the checkboxes in this field empty.
- Click Next >.
- If in step 1 you right-clicked the geodatabase (not a dataset), select a coordinate system to be used for XY coordinates. Click Next >.
- If in step 1 you right-clicked a dataset (not the geodatabase), set an XY tolerance. Click Next >.
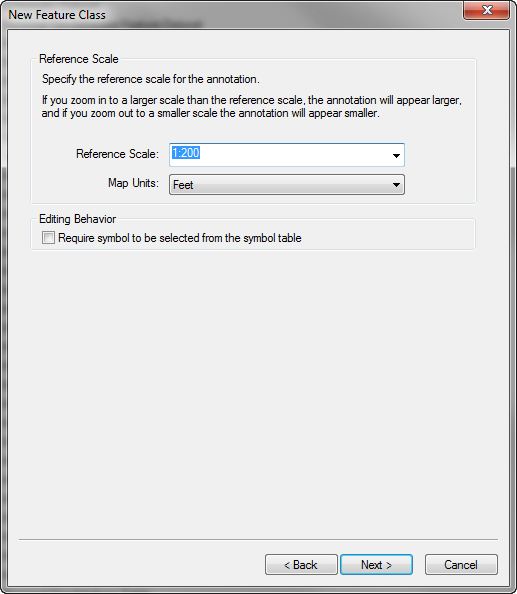
- If you're creating a feature other than ArcFM Annotation, skip to step 11. If you're creating ArcFM Annotation, enter a Reference Scale (e.g., 200) and select the appropriate map units. That annotation font size may be altered only by adjusting the Reference Scale. The Editing Behavior field does not impact ArcFM functionality and should be left empty. Click Next >.

- Set the Annotation Classes, Label Field, Text Symbol, Placement Properties and any other options. Click Next >.
- Add any necessary fields. Fields may also be added using the Esri Properties dialog after the feature has been created. The field names cannot contain spaces or special characters. Click Finish.
 |
For feature-linked annotations used with Designer Express's Design Feature Classes, add the following fields and model names BEFORE using the Designer Express Configuration wizard. If you add the DesignID field after using the wizard, the field won't be automatically populated.
- In the New Feature Class wizard, add the DesignID field.
- In the ArcFM Properties Manager, use the Field Model Names tab to assign the DesignID field model name to the new DesignID field.
- In the ArcFM Properties Manager, use the Model Names tab to assign the DesignerFeature class model name.
|


