This section allows you to manage existing users (e.g., set passwords, roles) and create new users.
Manage Users
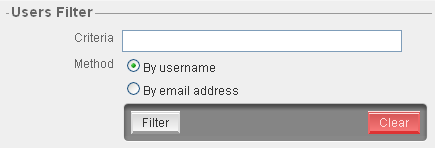
- Users Filter: This tool allows you to filter by username or by email address.
- Select the field by which you are filtering and enter a value in the Criteria field. Click Filter to pare the list of users down to those that meet the criteria. Click Clear to empty the field and prepare for a new search. If more than 100 users are located, you will be prompted to narrow the search criteria.

- Select a user by clicking the username in the far left column. You may use the Users Filter to locate a specific user.
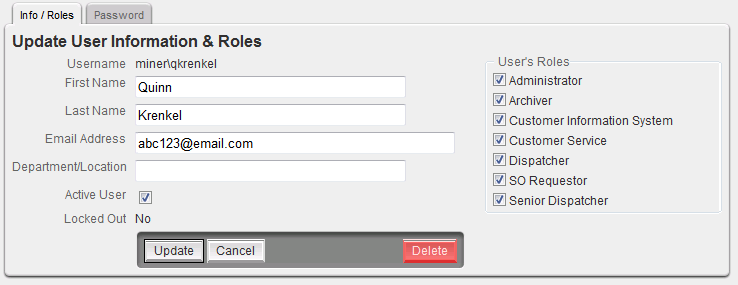
- The Info/Roles tab allows you to modify information such as the user's name, email address and Department/Location. Click Update to save changes before selecting another tab. If you don't save before selecting another tab, your changes will be lost.
- You may click Delete to remove the user from the system or clear the Active User checkbox to simply de-activate the user.
Warning: If you plan to use Archive Explorer to run any historical reports that may include information about the user, then DO NOT delete the user. This will cause the loss of some historical data. Instead, clear the Active checkbox to make the user inactive. This removes access to the user from Responder Explorer while preserving any historical data relating to this user.

- The Password tab allows you to reset a user's password. Click Update to save changes before selecting another tab. If you don't save before selecting another tab, your changes will be lost.

Create New User
- Select Administration | Users | Create New User.
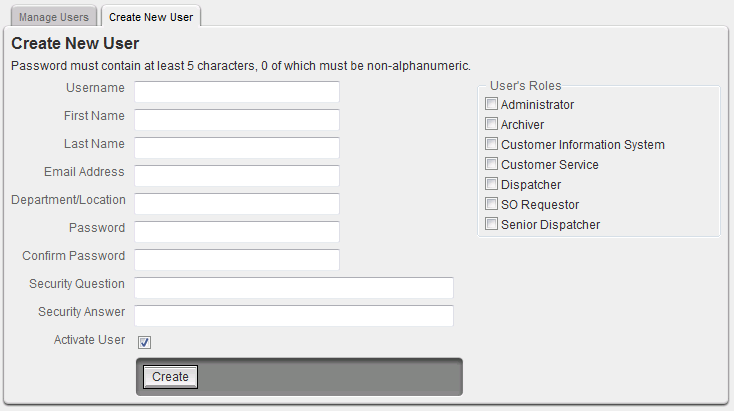
- Enter the user's information. The First Name, Last Name, and Department/Location fields are not required. All others are required. The Username value must be in all lower case.

- Assign roles to the user by selecting the checkboxes next to the roles to assign.
- Select the Activate User checkbox to allow the user access to the system. This field is selected by default. You can set up a user and deny access to the system by clearing the Activate User checkbox.
- Click Create.
Once created, the user will be added to the Manage Users tab.


