
Version: 10.2.1c and 10.2.1c SP3 |
| Responder Overview > Create Incident > Customer Call |
Available in Responder Web Browser.
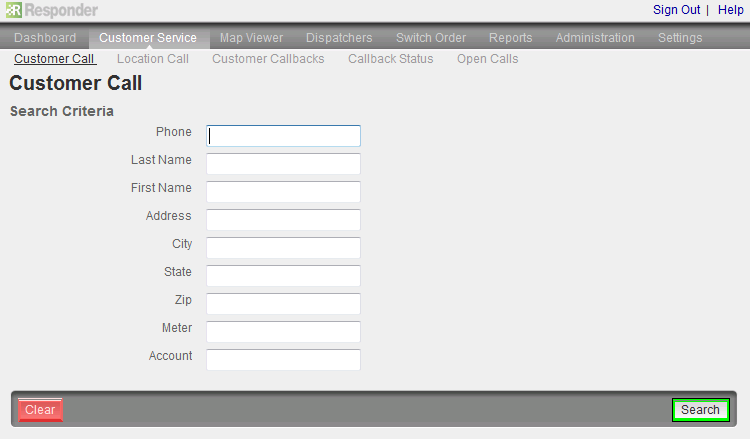
The Customer Call form provides the operator with the means to log a new call from a customer. Critical customers are indicated in the Critical field with red text (e.g., Residential Medical, Medical Care Facility, Emergency Responder). When a call is logged, Responder analyzes the existing incidents and adds the call as appropriate. It may be added to an existing incident, or a new incident may be created.
Search by Telephone Number: You may also search by phone number in the Phone field, using the entire number or the first few digits. Use the percent % wildcard symbol to locate a specific series of numbers. For example: %5703. This search locates all phone numbers that contain this series of digits (321-570-3152, 321-123-5703). Searches performed in this field will search the Home, Work and Mobile phone number fields in the Responder database.
If no records match your search criteria, "No Customers Found" appears at the top of the form. Click Clear to clear the form and perform another search.
If multiple records fit the search criteria, Responder returns a grid displaying the found set of customer records. Click Select next to the customer to view. If you have selected the wrong customer, click Return to Search Results to view the search results again. Click Cancel to clear the search results and perform another search.
Incidents cannot be created for customers who are disconnected. If the search results in the selection of a disconnected customer, the Submit button remains disabled.


 |
If the selected customer has a Connect Status of Disconnect - Non Pay, the Trouble field will display only an option of <None>. Your administrator may perform an optional configuration to add values to this field. But by default, NonPay customers can have a trouble value of <None> which allows them to report hazards. |
 |
Outage calls with hazards will submit two calls: one for the hazard and one for the outage, so that they can be managed separately, if desired. They can be combined with normal tools as well, such as the Consolidate tool. |
 |
The area code of a phone number must not begin with a 1 or 0. |


