
Version: 10.2.1c and 10.2.1c SP3 |
| Responder Overview > Archive Explorer > Archive Explorer Tools |
The following menus appear at the top of Archive Explorer:
 |
The initial setting of the time format respects your machine's settings. If your machine is set to a 24-hour format, clearing Use 24-Hour Format sets your times to the 12-hour format. |
The buttons on the Archive Explorer toolbar allow you to locate and view an incident, tag, or ground on the map. The following buttons appear on the toolbar by default:
 Highlight: The incident symbology flashes three times on the map. If the symbology is not visible in the map display, you may need to click Zoom To first.
 Zoom To: Zooms the ArcMap display to the selected incident.
 Pan To: Move the ArcMap display to view the selected incident without modifying the current map scale.
 Refresh: Refreshes the data.
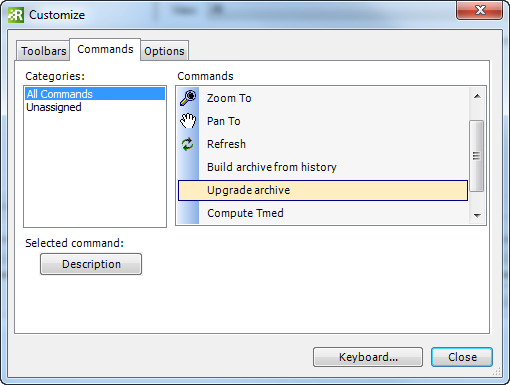
The following buttons are NOT on the toolbar by default and must be added using Customize.

Figure 1
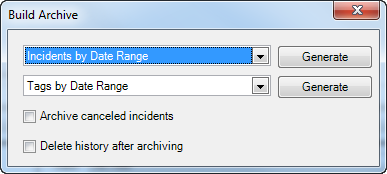
Click Generate next to either Incidents by Date Range or Tags by Date Range, depending on need.
If you select the Archive canceled incidents checkbox, cancelled incidents and features are archived and appear in Archive Explorer.
If you select the Delete history after archiving checkbox, the incidents will be removed from the Responder History tables and placed in the Responder Archive tables. If this field remains unchecked, the incident information will reside in both sets of tables.
 |
Before You Delete History: Before building your archive and deleting the existing history, it is important to first back up the original history tables. This is especially critical when performing this task for the first time. |
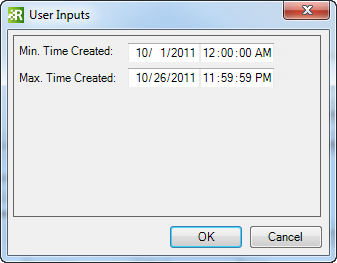
After clicking Generate, the User Inputs window opens. Enter a date range and click OK.

Archive Explorer now queries the Responder History tables using the date range provided. It uses the Time of Outage value when querying by date. All incidents that fall within this range are copied into the Archive tables and are available for viewing in Archive Explorer. Incidents that already exist in Archive Explorer will not re-import and the import continues without generating errors.
To add buttons to the toolbar:

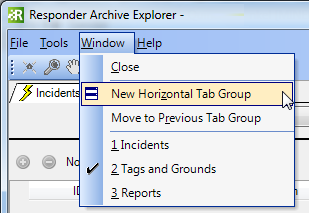
You can rearrange the tabs within the Archive Explorer application in one of the following ways:
