Overview
A circuit is defined as a path of glass that carries one or more wavelengths of light along the path. Circuit Manager helps you:
- Create and edit circuits associated with an end-to-end path in the fiber network
- View and manage circuit information
- Define and edit circuits along a connected path
- Change the header (origin) of a circuit
Availability Attributes
Whenever you use Circuit Manager to add, delete, or edit a circuit, or use Connection Manager to change a circuit path, the affected availability fields are automatically updated. This includes the attributes for number of available strands belonging to a fiber optic cable, as well as the availability attributes of individual strands. This functionality requires circuit healing and availability to be fully configured. Availability attributes belonging to existing circuit participants are not changed until one of the above operations takes place.
Create a New Circuit
You can use Circuit Manager to create new circuits and edit existing circuits.
Click the vertical and horizontal bars  to adjust the layout of the Circuit Manager window. You can also use the search bar to filter circuit names as you type.
- To create a new circuit, first select one feature (e.g., PatchLocation, DevicePoint, FiberOpticCable, Splitter) on the map using the Selection tool while in edit mode.
 |
You can create new circuits when the selected feature has a related object with the FIBERCONNECTABLEOBJECT model name assigned (either point or line). An administrator assigns model names and determines which features are compatible with this tool. |
- Click the Circuit Manager button
 to open Circuit Manager.
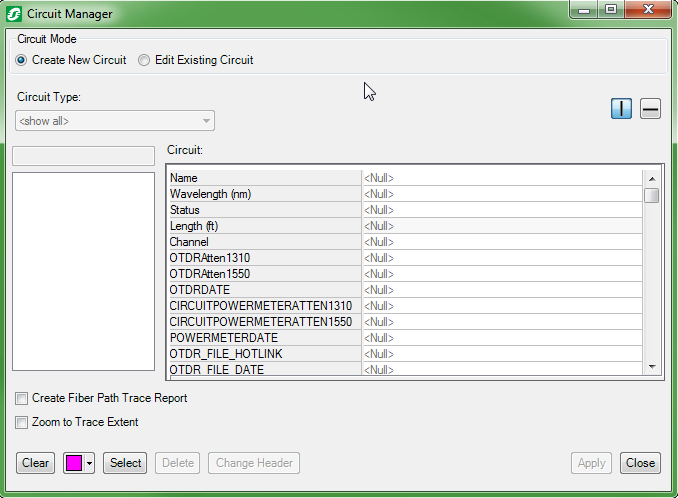
- Click the Create New Circuit radio button. This button will not appear unless you are in an edit session.
- Select the Create Fiber Path Trace Report checkbox to display a trace report in a web browser when you later run the circuit trace.
- Select the Zoom to Trace Extent checkbox to view the trace path in the map.
- Click
 to display a color palette to select the color for your circuit trace. This is especially useful if you want to display multiple trace paths at the same time with different colors.
- If you want to perform the trace on a specific wavelength, type a value in the Wavelength (FIBERLAMBDA) field. Fiber Manager saves this value after you click a different field.
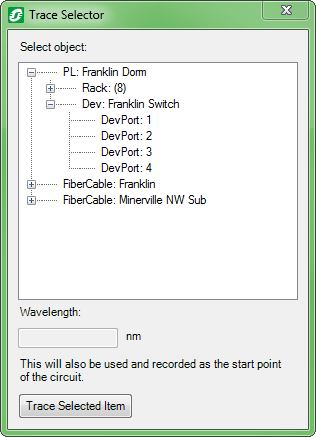
- Click Select to display the Trace Selector window.
- In the Trace Selector window, select the port that represents the origin of the circuit and click Trace Selected Item to trace the circuit.
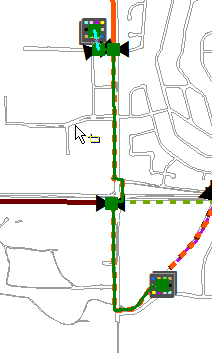
- The trace path appears on the map in the chosen trace color. Click Clear on the Circuit Manager form or Clear Graphics on the Fiber Manager toolbar to clear the highlighted trace path.
- To save the new circuit, type attribute values for the circuit. At minimum, you must name the circuit.
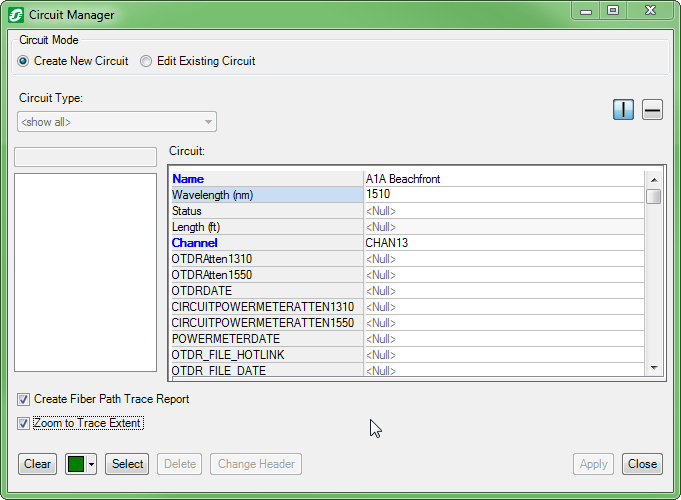
- Click Apply to save and Close to exit the form.
Edit an Existing Circuit
- Click the Circuit Manager button.
- Click the Edit Existing Circuit radio button. This option will not appear unless you are in an edit session.
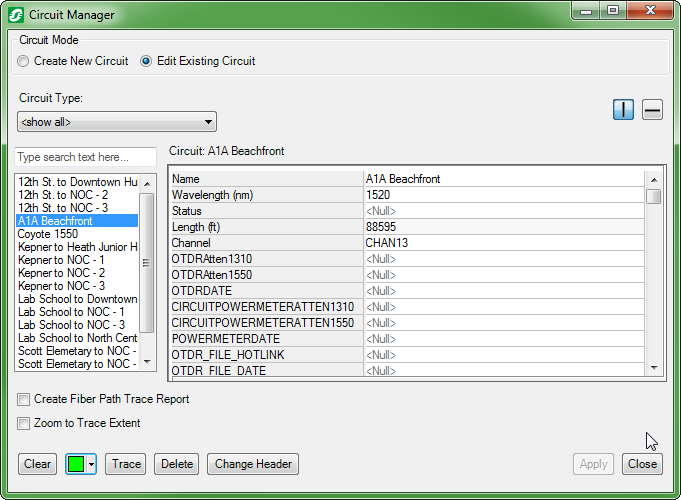
- Highlight the circuit you want to edit. If you want to delete the circuit, click Delete.
- Click the Create Fiber Path Trace Report checkbox to display a trace report in a web browser.
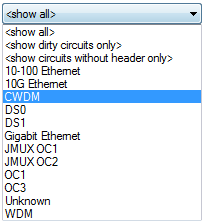
- You can filter the selection by choosing a circuit group from the drop-down menu. Your administrator configures this information.
- Click Trace to trace the circuit and zoom to the highlighted path on the map. Click Clear on the Circuit Manager form, or Clear Graphics on the Fiber Manager toolbar, to clear the highlighted path.
- Modify the attributes and click Apply to save your changes. Clicking Close will close Circuit Manager without saving your changes.
Change the Header of a Circuit
If you want to change the header (origin) of an existing circuit, you can use the Change Header button.
- Select a feature containing the connectable object that you want to set as the new header.
- Open Circuit Manager and locate the circuit.
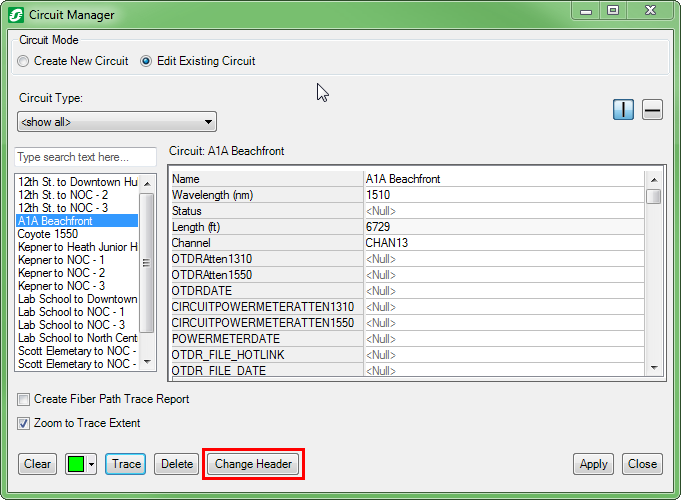
- If you also want to change the wavelength (FIBERLAMBDA) for this circuit, type a value in the field, click off the field, then click Change Header.
 |
Be certain to change the wavelength value prior to clicking Change Header. This enables the Wavelength field in the Change Circuit Header window to be updated with this value. |
- With Zoom to Trace Extent selected, click the Change Header button.
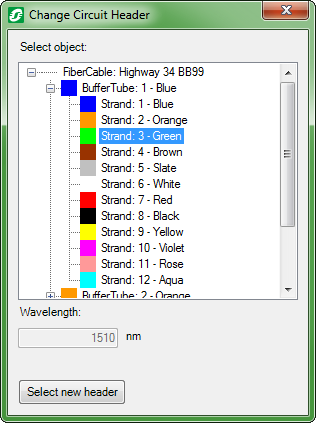
- In the Change Circuit Header window, expand the appropriate object and select a different connectable object, then click Select new header.
- Click Trace to see the trace results in the map.
- Changes will not take effect until you click the Apply button.
Change Only the Wavelength on a Circuit
You can change only the wavelength on a circuit and leave the header untouched.
- Open Circuit Manager and locate the circuit.
- Type a value in the Wavelength (FIBERLAMBDA) field then click off the field.
- Click the Create Fiber Path Trace Report checkbox then click Trace.
- Verify that the top of the report reflects the wavelength change you made.

- Click Apply to save your changes, then click Close.


 to adjust the layout of the Circuit Manager window. You can also use the search bar to filter circuit names as you type.
 to open Circuit Manager.

 to display a color palette to select the color for your circuit trace. This is especially useful if you want to display multiple trace paths at the same time with different colors.


