The Possible Path Tool traces all available routes between two points in the fiber network using trace criteria that you define (e.g., fiber count, owner, type). Use this trace to determine the availability of fibers in your network. For example, you could use the Possible Paths Tool to determine how many underground fiber optic cables with two or more fibers are available between two points in your network.
- Click the Possible Paths button
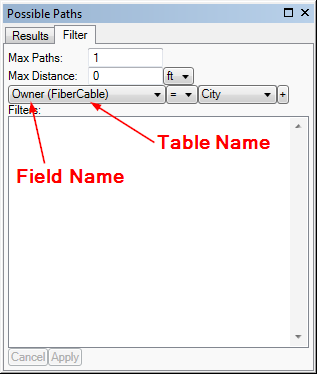
 on the Fiber Manager Toolbar. The Possible Path form appears. On the Filter tab, change trace criteria using the values in the drop-down menus.

- Use the Max Paths field to designate the maximum number of paths you want the tool to trace. In a large network, tracing more than three paths can impact performance.
- Use the Max Distance field to limit the distance of the trace. Selections are available for feet, meters, miles, and kilometers. The maximum distance is glass length and not map length. Leave this value at 0 if you do not want to specify a distance for the trace. If you have a large dataset that spans multiple markets, you may want to specify a max distance to limit your results and minimize the amount of time that the trace takes.
- Use the filter fields beneath Max Distance to logically combine filter criteria. Changing the field/table drop-down filter also changes the behavior of the adjacent filter fields. Click the plus button
 to add the filter to the list.
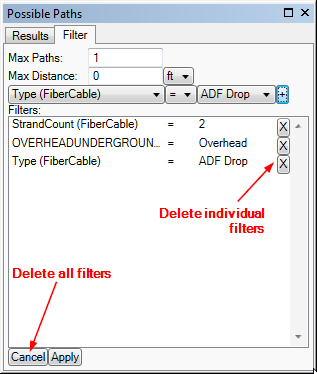
- Click Apply to set the filter parameters.
- Click Cancel to remove all filters. Click the X to the right of each filter to delete one at a time.

- The cursor changes to a flag
 . Use the flag to specify the start and end points of the trace. Valid start and end points include patch locations and splice locations.
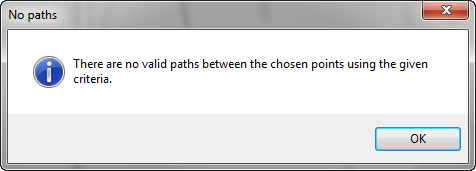
- This message displays if no paths meet your trace criteria:

- Change your trace criteria on the Filters tab, and reselect the start and end points. You may need to broaden the criteria in order to find a valid trace path.
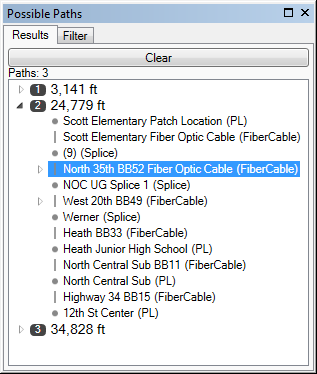
- Once a search with valid criteria is executed, the shortest path found between the two points satisfying the trace criteria is highlighted in the map window. The Possible Paths Results tab lists the maximum number of paths found between the two points that met the trace criteria. Select any path or feature in the results to display it in the map. Right-click the path or feature and click Select Feature to add to the selected set, or select Zoom to Feature to adjust the size of the map to include the whole trace path.

- Subsequent mouse clicks on valid trace points in the map will initiate a new trace. For example, two mouse clicks at start and end points provides trace results between those two points. A third and a fourth click on valid trace points in the map provide new trace results with the previous results being replaced.
- While performing a trace within a large network, the Clear button on the Results tab becomes a Cancel button during the trace. If you click Cancel during a trace, traces that completed prior to clicking Cancel will be displayed.


 to add the filter to the list.
 . Use the flag to specify the start and end points of the trace. Valid start and end points include patch locations and splice locations.
