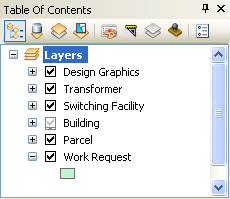
Workflow Manager allows you to place a Work Request polygon (spatial work request) around an area where work is being performed. A work request polygon will not be placed if you're working with an Access geodatabase.
Mobile: Work request polygons are not included in the XML packet transferred between the field and Enterprise. Therefore a polygon created in the field is not visible on the Enterprise and vice versa.
To add a Work Request polygon:
- In Workflow Manager, select or create a work request.
- On the Location tab, select a Feature Type from the dropdown menu and enter the Facility ID of the feature you want the Work Request polygon centered around. NOTE: The label for this field is Facility ID, however, it requires the value of the ArcFM Display Field for the Feature Type. For example, if the ArcFM Display Field for a pole is OBJECTID, enter the OBJECTID of the pole. In this case, entering the Facility ID would generate an error.
- Click Apply. The first time you open the associated design, ArcMap will create a Work Request polygon around the feature and zoom to it in your design version. Every other time you open the design, the display will zoom to the last extent of the stored display associated with the design.
If you do not select a feature on the Location tab, you may still create a work request in ArcMap:
- With the design open, locate the area on the map to be encompassed by the work request.
- On the Design tab in the Attribute Editor, select the work request.
- Select the Shape field and click the Edit Shape button to the right.
- Click the map to form the work request polygon. To finish, right-click and select Finish Sketch or press F2 on the keyboard.
- Click Create on the Attribute Editor to save the polygon and update the map. Once the polygon has been created in a versioned database (SDE), the Undo/Redo tools will not impact it.
You may also create multi-part work requests.

WR 170 is a multi-part work request.
- With the design open, locate the area on the map to be encompassed by the work request. The work request polygon may or may not exist.
- On the Design tab in the Attribute Editor, select the work request.
- Select the Shape field and click the Edit Shape button to the right.
- Click the map to form the first work request polygon.
- Right-click and select Finish Part.
- Click the map to form the second work request polygon. You may create as many parts as you want. Click Finish Part to complete each one.
- To finish creating work request polygons, right-click and select Finish Sketch or press F2 on the keyboard.
- If you have created a new work request polygon, click Create on the Attribute Editor to save the work request and update the map.
- If you have modified the shape of an existing work request polygon, click Update on the Attribute Editor to save the work request and update the map.
For all work request polygons (spatial work requests):
You may modify where work request polygons are created by changing the WMSSpatialWRVersion value on the Configuration tab in the Process Framework Administration tool (see Configuration Guide).
- If this value doesn’t exist, Designer uses the Version Name string value in the Work Request Version registry key (HKEY_LOCAL_MACHINE\SOFTWARE\Miner and Miner\Designer8\Work Request Version).
- If neither of these values exists, Designer uses the design parent version.
Only when the design they belong to is open may work request polygons still be edited.


