

Version: 10.2.1c and 10.2.1c SP3 |
| ArcFM Desktop Overview > Designer Express > Work Location Design Feature Classes |
You can add Work Locations (WLs) to designs that will help organize cost items into logical groups for construction crews and accounting personnel.
Click a section title below to see its contents.
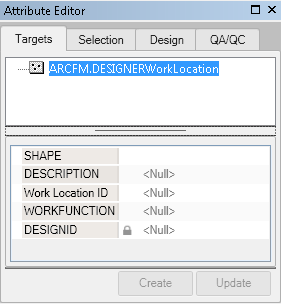
Add a Work Location to a Design
A WL represents the site area within a design where work is done, where equipment is located, or both. Designer Express WLs cannot be added in Workflow Manager. You must open the express design in ArcMap.
Remove a Work Location from a Design
When a WL containing associated features is removed from a design, the associated features are placed back among the unassociated features.
Additionally, when a WL is removed from a design, associations to any Design Feature Classes (DFCs) are lost. If you perform an Undo, although the WL is restored to the design, the associations are not restored.
Similarly, when a DFC is removed from a design, associations to any WLs are lost. If you perform an Undo, although the DFC is restored to the design, any associations to the WL are not restored.
 |
This behavior pertains only to associating and unassociating DFCs with WLs in the Design Estimate form. Removing a WL in the Design Estimate form does not affect DFCs or features in the map. |
Add Cost Items to a Work Location
You can add Cost Items to a WL in the same way that you add Cost Items to any other DFC.
Associate a Design Feature with a Work Location
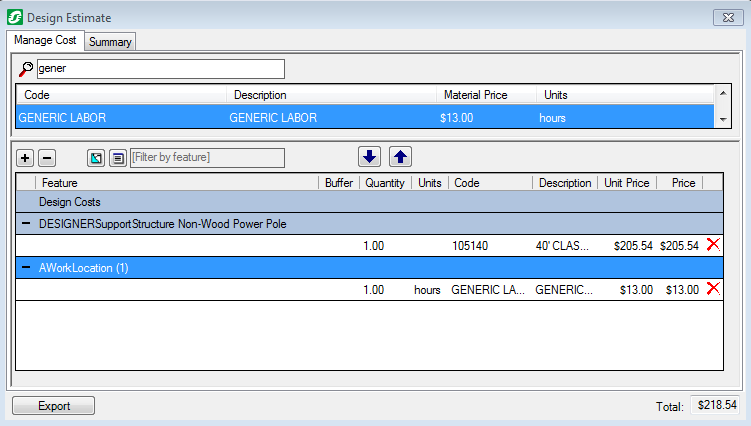
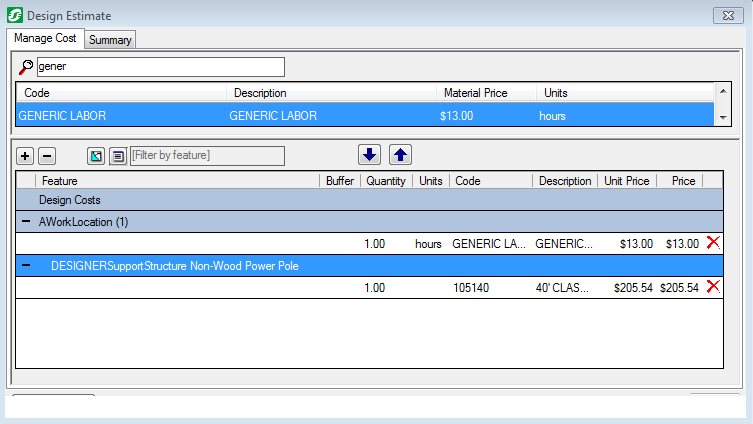
Design features can be moved from one WL to another. You can drag and drop items as desired.
The following image shows a design feature before association with a WL:
The following image shows a design feature after association with a WL:
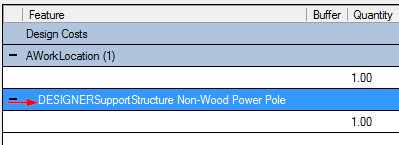
When a DFC is associated with a WL, it is indented slightly, as shown in this image:
Change Work Location Description or ID
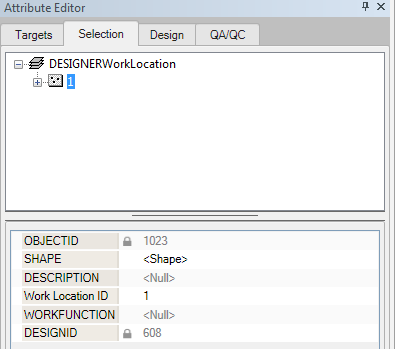
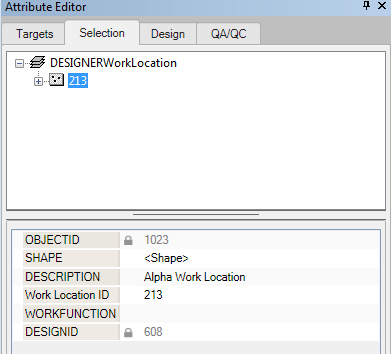
To change the WL Description or ID info, select the WL location and edit the Description or Work Location ID field in the Attribute Editor.
 |
Work Location ID is a text field, so you are not limited to just numbers in this field. |
The following image shows the Attribute Editor prior to editing:
This image shows the Attribute Editor after editing:
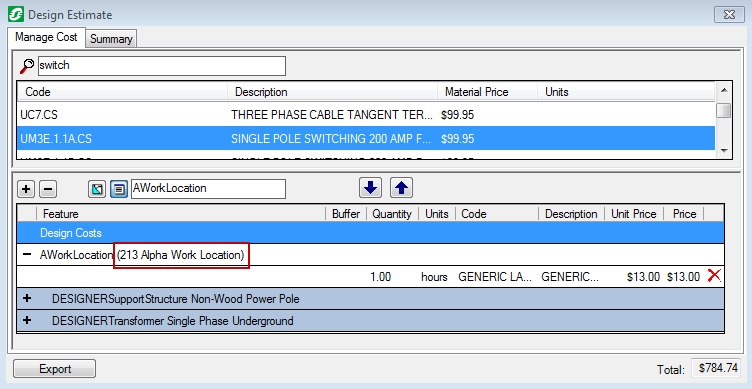
In this image you can see the changes that were made above in the Attribute Editor reflected on the Design Estimate form:
Set Automatic Work Location Numbering
The properties for setting automatic numbering are found by navigating to Customize > Designer Express Options. The following image shows the Automatically number work locations checkbox selected, with a start index of 1 and increment of 1:
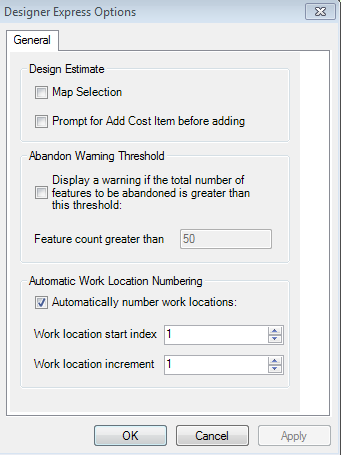
The start index and increment values can be edited via the up and down arrows to the right of the fields, or you can type a number in the fields.
Automatic numbering takes effect the next time you place a WL. Any WLs in existence before the change to automatic numbering are not affected.
 |
If you place a WL and change its ID to "1," then make the change to automatic numbering with a start index of "1," the next WL that is placed will have an ID of "1," which duplicates the one placed prior to the change. |
Place Text Related to a Work Location
You can place a text box related to a WL in the map. After selecting the WL, in the Attribute Editor use the Add Cost Item(s) text tool via right-clicking. When no cost items are associated with the WL or any of its associated features, the option is greyed out. If there are cost items associated with the WL or any of its associated features, the option is enabled.
After you select a point on the map, the text box is placed on the map at that selected point.
 |
If you make changes to Cost Items in the Design Estimate form, those changes are not updated in the text box. Once the text box is created, it can be moved or deleted, but the text cannot be edited. |
This image shows the Cost Item data on the Design Estimate form that will be populated in the text box:
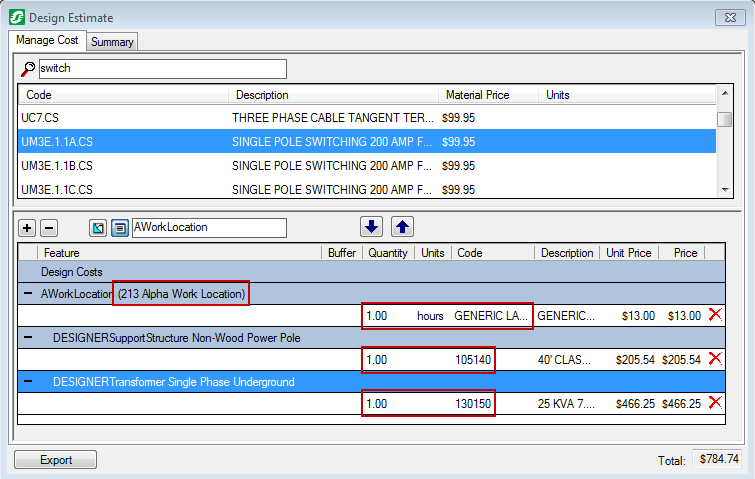
This image shows the text box placed in the map:

 |
If a cost item is listed under multiple DFCs that are associated with a single WL, those cost items will be combined as a single line in the text box. |
Exit the Application
When you make changes in DFC to WL associations and exit the application, you will be reminded that changes have been made and be prompted to save those association edits.