Use the Logging tab to set up the level of reporting and the location of the log file. You can also view the live logging output on the Logging tab.
- First, ensure you have the correct service selected in the Available Services window.
- Select the Logging tab.
Toggle image of Logging tab
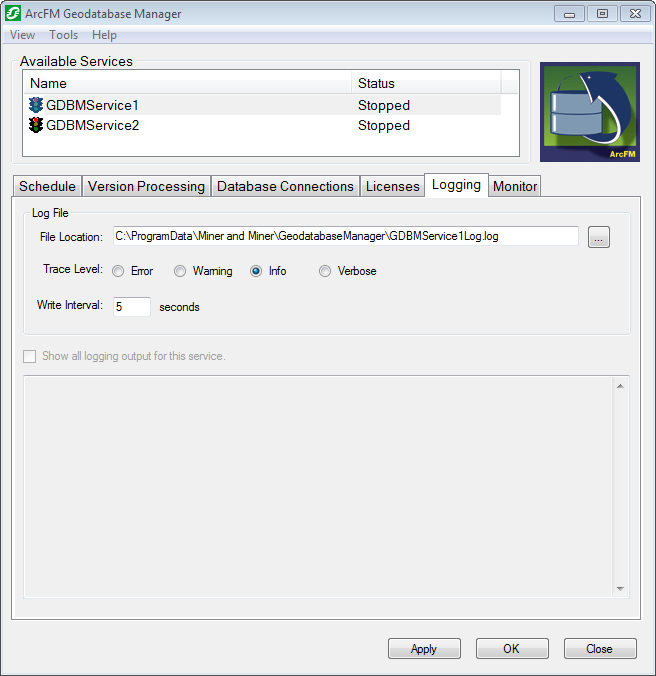
The Logging tab on the ArcFM Geodatabase Manager
- By default the log file is saved here: C:\Documents and Settings\All Users\Application Data\Miner and Miner\GeodatabaseManager\GDBMService1Log.log. Click the Browse button after the File Location field to modify this location and/or file name. Geodatabase Manager does not currently support saving log files across a network. The path in this field must be local.
|
If you save the configuration with a blank File Location field, the log file will be saved to your temp directory (C:\Windows\Temp).
|
- Choose a logging level in the Trace Level field.
- Error: Select this option to include only errors in the log.
- Warning: Select this option to include errors and warning messages in the log.
- Info: Select this option to include errors, warnings and informational messages in the log.
- Verbose: Select this option to include all messages in the log.
- The Write Interval determines how often (in seconds) the log file is updated. Enter a value. Default=5.
- Click Apply to save changes and retain the Geodatabase Manager window. Click OK to save changes and dismiss the window. Click Close to dismiss the window. You will be prompted to save changes before closing.
|
You can modify the configuration of a service while it is running, but your changes will not be active until the service is restarted.
|
The window at the bottom of the screen shows the on-going log for the selected service if it is running. This active log is always set to verbose. As new entries are added to the active log, older entries are removed. You may maintain a complete log using the settings as described above.