This page walks you through creating a click-once deployment for the first time. This customization requires:
- MageUI.exe (installed with Visual Studio)
- *.pfx file
- Bootstrapper Manifest Generator (for optional setup.exe)
This process requires that you first create the click-once deployment. Optionally, you may create a web page from which users may access the deployment. You may also create a setup.exe to install the prerequisites. Use the following sections to set up and manage your Click-Once deployment.
Copy Files
To set up Click-Once deployment for the first time, follow the steps outlined below.
- Run the Mobile installer and configure the application. This needs to be done on only one machine.
- Browse to C:\Inetpub\wwwroot and create a directory that will house your click-once web service.
- Create a subfolder in this directory called Mobile_1_0_0_0. You will need to copy files into this directory, so you may want to keep a Windows Explorer window open to it.
- Copy all files that need to be deployed into this Mobile_1_0_0_0 directory. Generally, you will need the following (these are default locations):
- Contents of the Mobile Bin directory (C:\Program Files\Miner and Miner\ArcFM Mobile\Bin)
- Mobile Documentation directory (C:\Program Files\Miner and Miner\ArcFM Mobile\Documentation)
- Optional. You can distribute a pre-configured configuration file as well. To do this, browse to the application directory in which it is stored (e.g., C:\Documents and Settings\[Local User]\Application Data\Miner and Miner\Responder) and copy the configuration file (e.g., ResponderMobile.exe.config) into the Mobile_1_0_0_0 directory.
- Optional. You may also distribute the local map cache. Without this, the client will need to open the map with a network connection once to create the map cache. This optional configuration allows you to provide the local map cache for them, removing this requirement. To do this, copy the local map cache directory (e.g., ResponderDatabase) into the Mobile_1_0_0_0 directory.
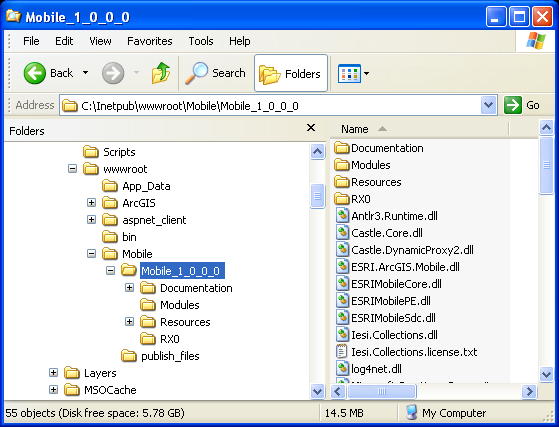
Figure 1, In this example, the Mobile_1_0_0_0 directory contains the Mobile\Bin contents and the Mobile\Documentation directory. The RX0 directory is the local map cache. This directory also contains the ResponderMobile.exe.config file to pre-configure client machines.
Create Application Manifest
Next you'll need to use MageUI.exe to create a new application manifest.
- OpenMageUI.exe. This tool is installed with Visual Studio.
- Select File > New > Application Manifest.
- In the Name section provide the following
- Name: A name for the Application Manifest.
- Version: This version should match the Mobile directory you created in an earlier step (e.g., Mobile_1_0_0_0 would have a version of 1.0.0.0).
- Processor: Set this to x86.
- In the Files section, select the checkbox labeled "When populating add the .deploy extension to any file that does not have it."
- Also in the Files section, browse to the Mobile_1_0_0_0 directory.
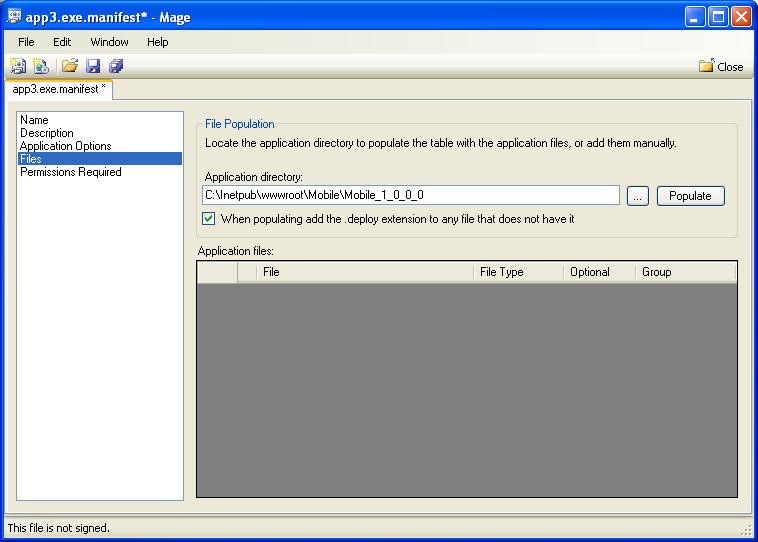
Figure 2, Files section of MageUI.exe.
- In the Files section, click Populate. When prompted to confirm, click OK. This populates the window in the Files section with all of the files that will be deployed.
- Set the File Type field to Data File for all files in the map cache.
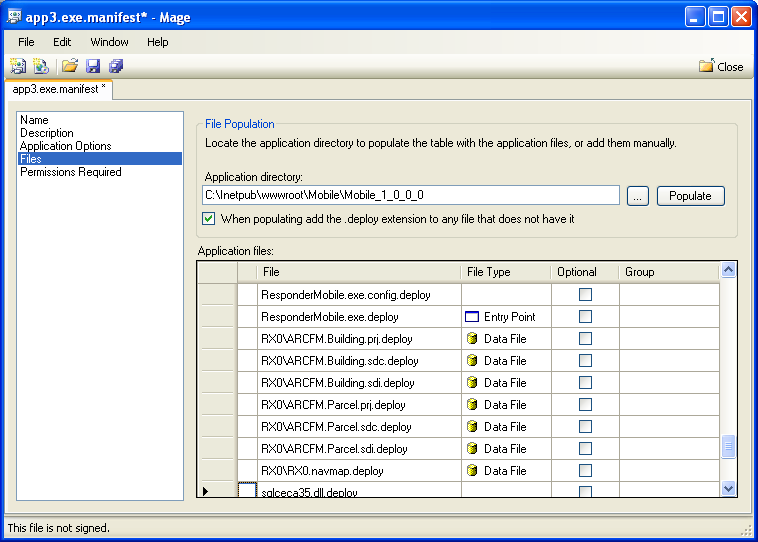
Figure 3, Set map cache files to a File Type of Data File.
- Save the application manifest (File > Save).
- When prompted, browse to a valid *.pfx file and click OK. This allows you to properly sign the manifest.
- Save the application manifest into the Mobile_1_0_0_0 directory.
 |
If you get a Warning while saving the application manifest, pay attention to the errors. The warning shown below is common. It indicates that the Miner.Mobile.Common.dll and Miner.Mobile.Responder.dll files are duplicated in the directory. These commonly reside in the Bin and Bin\Modules directories.
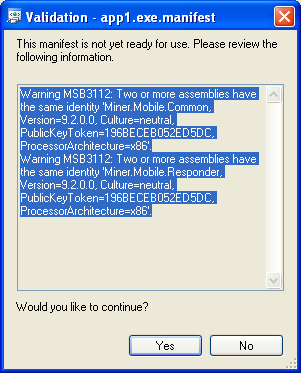
Figure 4, Manifest errors
To correct this, click No. Then browse to Mobile_1_0_0_0 and delete Miner.Mobile.Common.dll.deploy and Miner.Mobile.Responder.dll.deploy from the directory.
Next, in MageUI.exe select the Files section in the application manifest and select the rows that correspond to these two files. Delete both rows. Now save the application manifest again. This time it should save without errors.
|
Create Deployment Manifest
Next you'll need to use MageUI.exe to create a new deployment manifest.
- In MageUI.exe, create a new deployment manifest (File > New > Deployment Manifest).
- Enter a name and set the Version to match the directory you created (e.g., Mobile_1_0_0_0 would have a version of 1.0.0.0).
- Set the Processor to x86.
- On the Description tab, enter a Product name. Edit the Publisher field as needed.
- On the Deployment Options tab, select the following checkboxes:
- Include Start Location (ProviderURL) in the manifest and enter the start location in the Start Location field. The format looks like this: http://MachineName/MobileDirectory/DeploymentManifestName (e.g., http://Machine/Mobile/ClickOnce.application).
- Automatically run application after installing
- Use .deploy file name extension
- On the Update Options tab, select the check box labeled "This application should check for updates" and choose the "Before the application starts" radio button.
- On the Application Reference tab, click Select Manifest and select the application manifest you created in the previous steps (e.g., located in the Mobile_1_0_0_0 directory). Click Open.
- Save the deployment manifest (File > Save).
- When prompted, browse to a valid *.pfx file and click OK. This allows you to properly sign the manifest.
- Save the application manifest into the first directory you created (e.g., the Mobile directory in Figure 1). This directory was created in step 2 of the Copy Files section.
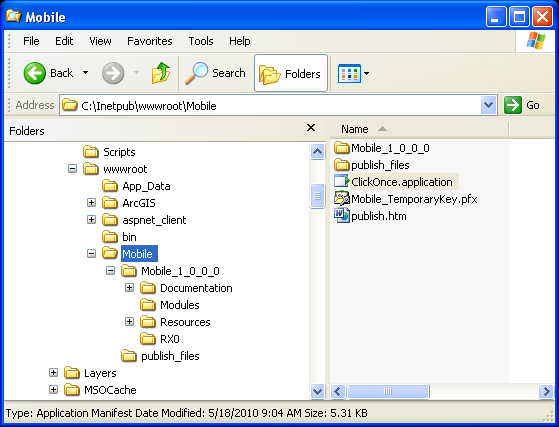
Figure 5, Deployment manifest saved to Mobile directory.
- Close MageUI.exe.
Create Web Page
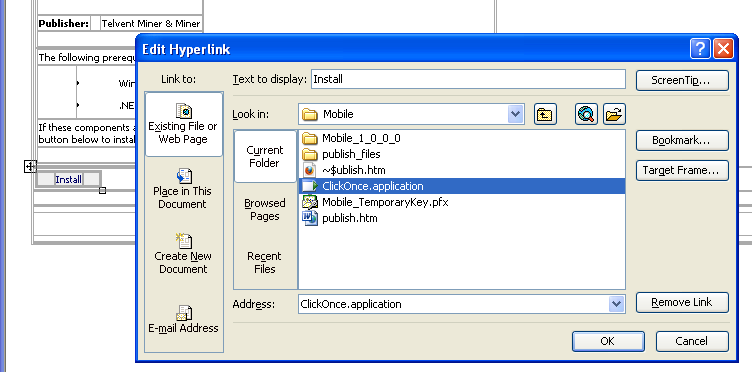
This step is optional, but does provide users a place to access the click-once deployment you just created. Create an Install button that links to the *.application. In the example on this page (Figure 5), the link would be to ClickOnce.application.
Create Setup for Prerequisites
Use an application such as Bootstrapper Manifest Generator to create an executable that installs the prerequisites for your Mobile application. Mobile applications require .NET 3.5 SP1 and Windows Installer 3.1. Refer to the Mobile Read Me for a complete list of prerequisites.
Uninstall Click-Once Application
The Responder Mobile click-once install is listed in Add/Remove Programs as Responder.