This set of steps allows you to set up landbase layers that can be viewed in the field. You must have ArcGIS for Windows Mobile 10.2 installed to do these steps. If you do not have ArcGIS for Windows Mobile 10.2 installed, you can not locate or use the Mobile Toolbox. Responder Mobile uses ArcGIS for Server to display map data. Use Create Mobile Cache in the ArcToolbox to create the three files that display your landbase data in the field. Use ArcGIS Server Manager to make layers available for selection in the field. Follow the steps below to set up your landbase layers for use in the field. Refer to Esri documentation for more help on ArcToolbox.
- Open ArcMap without logging into ArcFM.
 |
You must select layers that are connected to the same database that Responder is configured to use.
|
- Create an *.mxd file that includes ONLY the layers you wish to view and select in the field. Keeping these layers to a minimum will improve performance in the field. The image below shows the layers included in a sample implementation. Recommended layers to include:
- View Only: Include landbase layers such as Parcel and Building.
- Incidents and Hazards: Include the layers on which incidents and hazards may be placed (e.g., Transformer, Service Point).
- Responder Layers: Include the relevant Responder layers. These are the layers that field users will need to be aware of (e.g., Incidents, Crews, Hazards, Tags & Grounds). Be sure to remove these layers from the Responder_cached layer before saving the map.
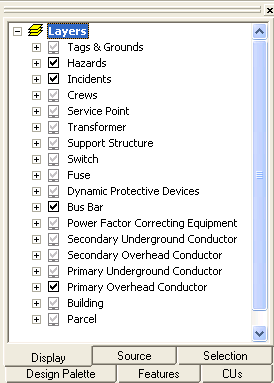
Note that the Responder layers have been removed from the Responder_cached group.
 |
All layers in the *.mxd MUST have an objectID field. Do the following for all layers that are based on Views or are XY Event Layers (Hazards, Electric Incidents, Cuts, Tags, Location Features, Crews, Single Premise Incidents, etc.):
- Add the layers using the Add Query Layer tool. If this tool is not visible on the toolbar, add it using the Customize option when right-clicking the toolbar.
- The New Query Layer tool opens.
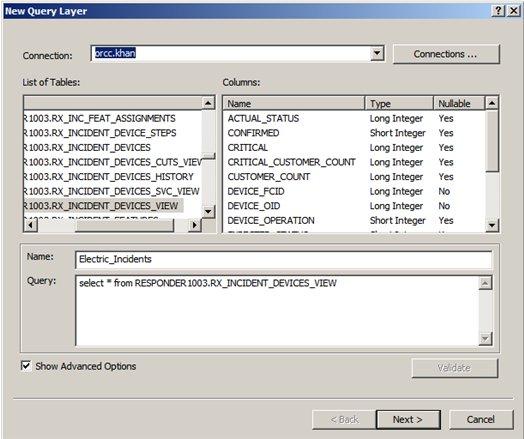
- Select the data source to use. This should be the same data source as the Responder services are pointed to.
- Double-click the table to view, such as RX_Incident_Devices_View. The Query populates with the table information. Do not select any columns.
- Enter a name for the SQL Data Query, such as Electric_Incidents.
- Click Validate.
- Click Show Advanced Options.
- Click Next.
- Select the field or combination of fields that create the unique identifier. Frequently, this will be DEVICE_OID and DEVICE_FCID.
- Click OK.
- In ArcMap, select the Data Source view (List By Source) at the top of the Table of Contents. The queried table appears.
- Right-click the table and select Display XY Data. The layer is now available to be set up with the symbology as normal.
|
- Set the map extent:
- Zoom out to fullest extent of your map.
- Right-click the data frame and select Data Frame Properties.
- Under the Extent Used By Full Extent Command, click Other and then Specify.
- Select Custom Extent. If your map is zoomed to the full extent, the current settings are correct.
- Save and close the new *.mxd file.
- Create a directory that has the same name as the SQL Express database. This is also the Initial Catalog value in the Miner.Responder.MobileService.exe.config. The default is ResponderDatabase. The *.mxd you created in step 3 should NOT reside in this directory. This will become your Output directory in a later step.
- Open ArcCatalog and click the ArcToolbox
 button.
- In ArcToolbox, expand Mobile Tools and double-click Create Mobile Cache. If Mobile Tools are not available, add them by clicking Add Toolbox (which is available by right-clicking the ArcToolbox node), and navigate to the Mobile toolbox. By default this is installed here: C:\Program Files (x86)\ArcGIS\Mobile10.2\ArcToolbox\Toolboxes.
- In the Map Document field, select the *.mxd file you just created.
- In the Output Project Folder field, select the directory you created in step 5.
- Select ONLY the layers that will be read-only in the field (e.g., landbase). It may take a few minutes for the cache to create.
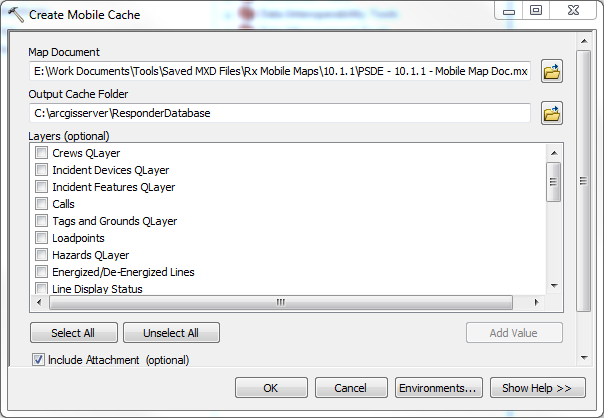
- Click OK.
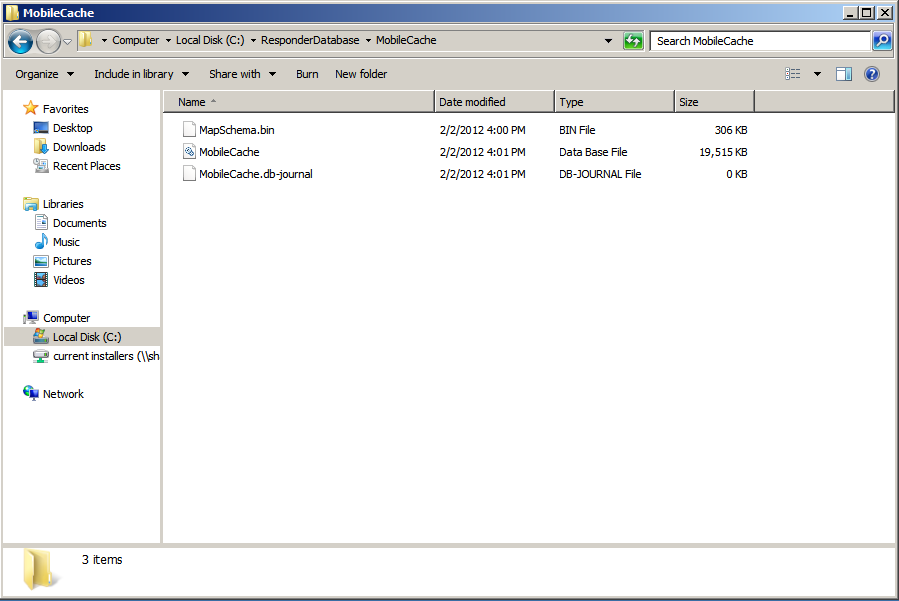
- The Create Mobile Cache tool will perform the extraction and create mobile cache files in the Output directory you created in step 4 and specified in the Output Project Folder field. In Windows Explorer, browse to the output folder specified in the Create Mobile Cache window.
- Copy the three files from the MobileCache folder to the ResponderDatabase folder on all machines you intend to set up as Mobile clients.
In the next set of steps, you will create the map service. The Map Server Path field on the field machines refers to this service.