

| ArcFM Desktop Overview > ArcFM > Attribute Editor > Navigating the Attribute Editor |
The Attribute Editor provides a wide variety of functionality. A user can perform functions such as view and edit selected features, edit features before placement, and view QA/QC results. The following tips show you how to navigate the Attribute Editor and interpret the data it presents.
Use the plus (+) and minus (-) signs on the number pad to expand and collapse nodes in the Attribute Editor. Each type of node has a specific icon associated (see Figure 1).
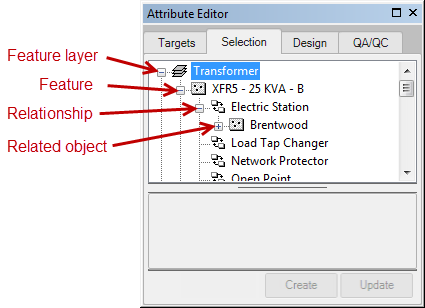
Figure 1, Icons on the Attribute Editor
If you want to expand or collapse multiple nodes at once, select the top-most node (of those you want to expand/collapse) and press the asterisk (*) symbol (expand) or the minus (-) symbol (collapse) on your keyboard number pad. The asterisk (shift + 8) and the minus on the main keyboard will not work. You must use the * and - in the number pad on your keyboard. This functionality also works on the Features tab.
When you're in an edit session, you can use Tab to move down and Shift-Tab to move up the list of attributes.
The ArcFM Display Field is the value of a specific field displayed on the Attribute Editor, as shown below. If the ArcFM Display Field (e.g., FacilityID), contains no value, then the ObjectID is shown. Administrators can change the Display Field at the Field Display tab of the ArcFM Properties Manager in ArcCatalog.
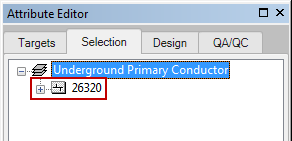
Figure 2, No value in the display name field; OID displayed by default
ArcFM allows the use of custom display name objects in the ArcFM Display Field. If your administrator has created and configured a custom display name object, feature display names may look different. In the example below, the display name object shows Facility ID, Valve Diameter, and Material.
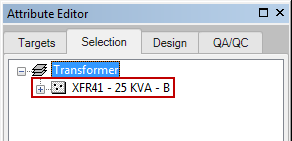
Figure 3, Custom display name object concatenates multiple fields
The Attachment Manager allows you open files attached to a feature. To access the Attachment Manager, you must select a feature that is enabled to allow attachments (see Esri's instructions for enabling a feature for attachments through ArcCatalog here.) If you are not editing, and the feature contains an attachment, you can click the paperclip icon to open the Attachment Manager. If the feature does not contain an attachment, then you cannot open the Attachment Manager unless you are editing.
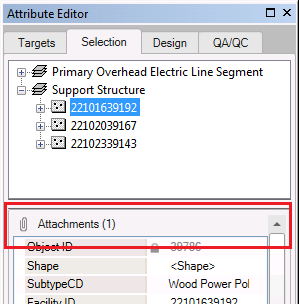
Figure 4, Access Attachment Manager
After opening the Attachment Manager, you can view the attached files by selecting them and clicking Open. Files open with their appropriate program or reader, if available on your machine. If you are editing, you can add a file to a feature by clicking Add and selecting the appropriate file for attachment. Click OK to save the attachment.
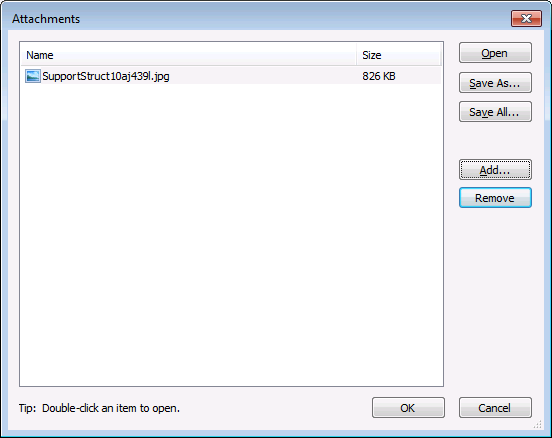
Figure 5, Attachment Manager
The Object Editor is the grid at the bottom of the Attribute Editor that displays attribute information for the selected feature. A blue field label indicates that the field value has been modified, but not saved. If a field does not accept a Null value and no value is assigned, it is highlighted in yellow. When you click Apply, the modification is saved and the field label returns to black.
A field value in red text indicates that the value does not exist in the domain assigned to that field.
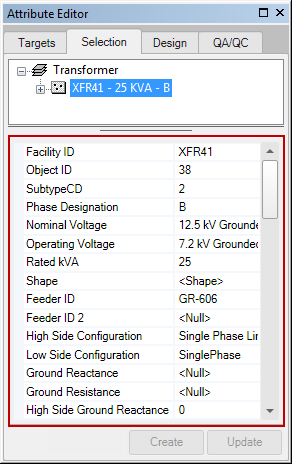
Figure 6, Object Editor
A variety of utility tools are available when you right-click nodes on the Attribute Editor, depending upon the type of node selected.
If the Attribute Editor form is hiding a highlighted feature, the form will become transparent to make the highlighted feature visible when it flashes.