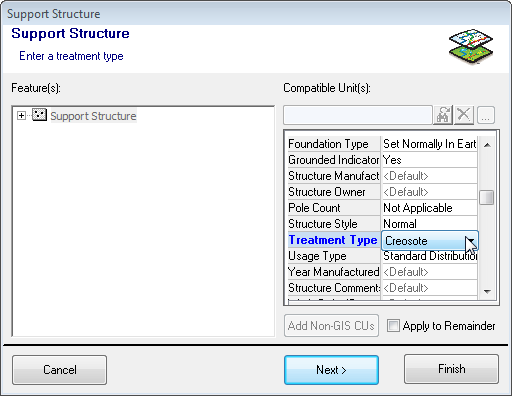
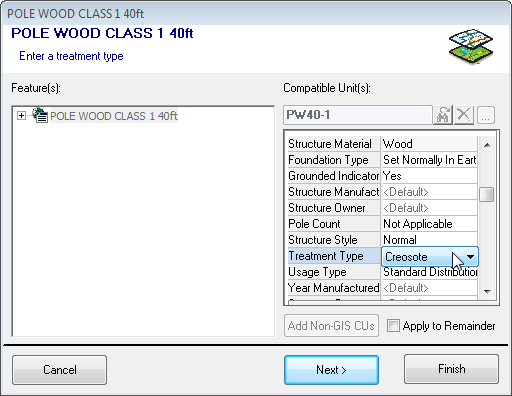
When the user places a template favorite that contains a feature or compatible unit (CU) requiring the user to enter attributes, the following dialog will appear.

Edit Attributes in ArcFM

Edit Attributes in Designer
- Instructions from your administrator will appear in the white bar at the top of the dialog ("Enter a treatment type." in the example above).
- Unselect the Apply to Remainder checkbox to modify the attributes for each feature in the series. Leaving this checkbox selected applies your attribute modifications to all features in the series. If this checkbox is disabled, the feature isn't part of a series or is the last feature in a series.
- Designer Only. The Compatible Units field and the Add Non-GIS CUs button will remain disabled when the only action required is to update attributes. These are enabled when the user must select a CU.
- Edit attributes in the grid at the right. If there are related objects, you can select and edit them as well. You must select the top-level object in the tree (Features window) to enable the Next and Finish buttons.
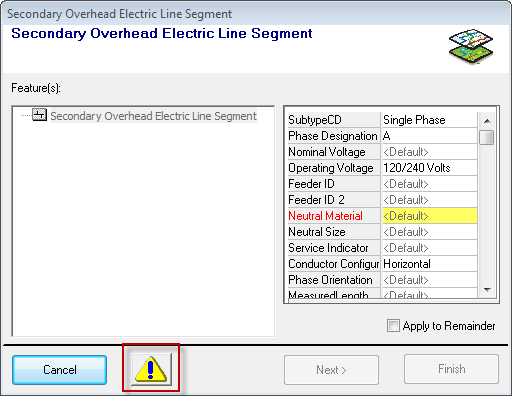
- If the feature is missing any required attribute values, a caution button will appear at the bottom of the window next to the Cancel button.

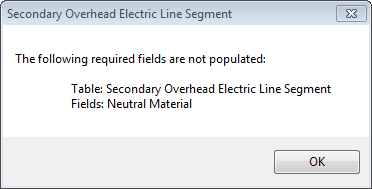
- Click the caution button to view the attributes that require attention.

- If a field does not accept a Null value and no value is assigned, it is highlighted in yellow in the object editor (e.g., Neutral Material, in the example above). The Next and Finish buttons will not be enabled until all required fields have values.
- Click Next > to continue placing the template favorite.
- You can click Finish to complete placement of the template favorite, accepting as many defaults as possible. ArcFM will prompt for any required actions.

