Configuring Responder/Smart Grid
Run AMI Events Simulation
| Smart Grid Applications Overview > Responder Overview > TroubleMaker Overview > Run AMI Events Simulation |
Version: 10.2 and 10.2.1 |
TroubleMaker allows you to create and execute simulations for dispatcher training or performance testing. To execute a scenario, you must have an historical database that contains AMI event information. The Build TroubleMaker Database tool in ArcMap populates the TroubleMaker database with customer call and AMI event data. You will need to execute this tool and populate the TroubleMaker database before simulations can be run. Refer to the Using Responder online help for information about this tool.
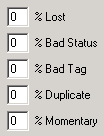
The #Events/Message field indicates the number of events to be assigned to each message.
The Events/Hour parameter is available only if you have selected a Fixed rate. This value indicates the number of events per hour that will be submitted to Responder. For example, a value of 3600 will cause Responder to submit one event each second.
The Min/Interval parameter is available only if you have selected a Profile rate. This value indicates the number of minutes for each interval in the profile. For example, if the value is 10, each interval will be 10 minutes in length.
The Events/Hr/Interval parameter is available only if you have selected a Profile rate. This value indicates the event rate per interval. Each value (separated by commas) indicates the number of events for the interval.
In the example below, there are three intervals (three numbers in the field): 250, 120 and 250. Responder will submit 250 events during the first 10-minute interval, 120 events in the second, and 250 events in the third. If the simulation runs out of events before the end of an interval, the simulation ends. If the simulation has more events than the intervals require, it will continue with additional intervals using the last Events/Hr/Interval rate (e.g., 250) until all events have been processed.
The Scale Factor parameter is available only if you have selected a TimeReceived rate. Use this value to speed up the scenario. For example, a value of 3 indicates that the events will be submitted three times faster than they were received.
Use the Submit Times as UTC checkbox to indicate whether times should be submitted as Coordinated Universal Time (UTC). If this box is unchecked times are submitted in local time.
The Randomize button is available only if you have a rate of Fixed or Profile. This tool is the equivalent of shaking the TroubleMaker database to mix up its contents. The customer events stored in the TroubleMaker database are submitted randomly during the simulation. The Randomize button shuffles the AMI event information in a random fashion. The Randomize button is disabled when you have the TimeReceived rate selected.
Once you have determined the simulation parameters, you can execute the simulation.
Click Start to execute. Once you've clicked start, the top half of the TroubleMaker window is disabled to prevent parameter changes during the simulation. You may click Stop to cancel the simulation before it is finished.
|
|
Send Comment to documentation@schneider-electric.com |