This tool allows the mobile user to perform inspections of equipment in the field and create or edit related objects as needed. For example, a mobile user may be inspecting support structures and find a pole attachment that is not represented in the GIS. The mobile user may use the Inspector tool to view existing attachments on the pole and create a new related object to represent the attachment.
General the Inspector tool is enabled only when the user has opened an edit session. This allows the field user to send the changes back to the enterprise.
This tool does require the appropriate model names be assigned. If you select a feature using the Inspector tool and the user interface isn't displayed, check with your administrator to be sure the correct model names are assigned. Refer to the Mobile Configuration Guide (Inspector section) for configuration information.
- Open an edit session using the Open New Edit Session
 button. The Inspector tool is not enabled in a redline session or with no session opened.
 - When an Edit Session is created, the Inspector tool is activated by default. If for some reason it is not activated, click the Inspector
 button. The Inspector button appears on the Session Manager toolbar by default.
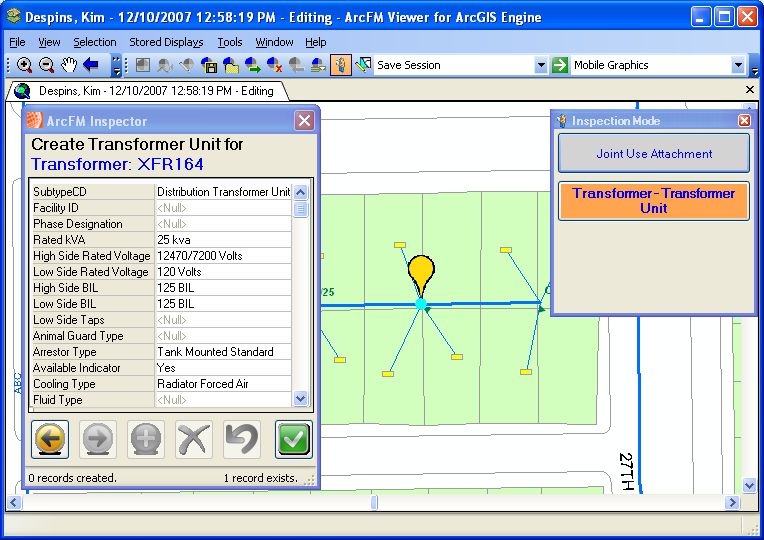
 - Select an option on the Inspection Mode dialog. Display this dialog by selecting View > Inspection Mode. Once you've selected an option, the cursor will snap only to the feature class identified as the source (by its model name).
- Select the feature you wish to inspect (e.g., support structure, cathodic protection test points, gas valves). A red marker appears when you hover over a source feature. A yellow marker indicates a selected feature. There are a couple ways to select. You can double-click it with the mouse. If you are using a tablet PC, you can select the Inspector button and use it to draw a box around the feature OR use the Gesture tool and double-tap the feature.

Figure 1
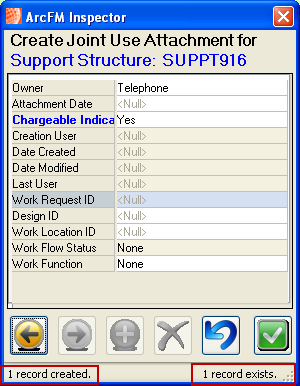
- When you have selected a feature to be inspected, the ArcFM Inspector window is displayed (Figure 2).

Figure 2
- Status messages at the bottom of the ArcFM Inspector window (Figure 2) let you know how many records have been created in the current session (records created, on the left) or how many records already exist (records exist, on the right). Use the yellow arrow buttons on the far left to peruse existing related records.
- To create a new related record, enter information into the fields displayed (gray fields may not be edited). If you have selected a yellow arrow to display an existing record, click the plus button to create an new related record.
- Once you have entered the attribute information for a new record, click the Apply
 button to save changes.
 - Use the Undo
 button to reverse the last change made.
 - Use the Delete
 button to remove related records from the current feature.
